(This article was originally published on strapi.io).
Hooks are one of the main built-in developer interfaces that we can use to customize and extend Strapi's default functionality.
In this article, we'll review and compare the three different types of Strapi hooks - describing and summarizing each type's method of implementation and common use cases.
To follow this article, although not required, a basic familiarity with Strapi will definitely help better understand the use cases and code snippets. Nevertheless, this is not a step-by-step guide, so feel free to skim through or just go directly to the hooks section you're looking for.
Let's begin.
Content-Type Hooks
If you're familiar with Strapi, you most likely already know what a Content-Type (or Model) is. A Content-Type is a JSON representation that is used to specify the underlying database structure of a content entity we want to store in Strapi's database.
The first type of hooks we'll examine are lifecycle hooks. These hooks allow us to extend Strapi's default Content-Type functionality, by introducing custom code that will run whenever (before or after) a query is executed over a Content-Type - no matter if that's done through the Admin Panel, an API call, or the execution of custom code that uses default queries.
"When you are building custom ORM specific queries the lifecycles will not be triggered. You can however call a lifecycle function directly if you wish." - Strapi Developer Documentation
Use Case Examples
Lifecycle hooks are ideal for when you'd want to automatically trigger an action whenever Strapi content is queried or updated.
Lifecycle hooks can be used, for instance in an e-commerce app, to send an email notification or clear a CDN cache, when a new product is added to the store.
How to Implement a Content-Type Hook
To create a Content-Type lifecycle hook, first, you'll have to determine to which model and to which query you would like to attach the hook. Here's the list of the available default Strapi queries:
find: Returns a list of entries matching Strapi filters.findOne: Returns the first entry matching some basic parameters.create: Creates an entry in the database and returns the entry.update: Updates an entry in the database and returns the entry.delete: Deletes an entry (or multiple entries at once) and return its value before deletion.count: Returns the count of entries matching Strapi filters.search: Returns entries based on a search on all fields allowing it.countSearch: Returns the total count of entries based on a search.
For each of the previous events, you can configure the hook to run before or after the event is executed. To do so, capitalize the first letter of the event name and prefix it with before or after.
You can now set a lifecycles key in the model file ./api/{apiName}/models/{modelName}.js with its respective lifecycle hooks.
Going back to the previous e-commerce app example, this is how a Product lifecycle hook that sends an email notification every time a new product is created could look like:
module.exports = {
  /**
   * Triggered before user creation.
   */
  lifecycles: {
    async afterCreate(data) {
      await strapi.plugins['email'].services.email.send({
        to: 'customers@my-store.io',
        from: 'noreply@my-store.io',
        subject: 'New Product Available!',
        text: 'Check out this amazing new product :)',
      });
    },
  },
};
Server Hooks
The second type of hooks - server hooks - allow us to add functionality to Strapi's core.
When the Strapi instance boots, server hooks are loaded into the global object, becoming therefore usable anywhere in the application.
Use Case Examples
By far, the most common application of server hooks is third-party service/API integration.
Check out some of the hooks made available by the community:
- strapi-hook-algolia: This hook allows you to use Algolia as a service in Strapi
strapi.services.algolia. - strapi-hook-magento: This hook allows you to use the Magento 2 Rest API with Strapi.
- strapi-hook-twitter: This hook allows you to use the Twitter API with Strapi.
- strapi-hook-allegro: This hook allows you to use Allegro Rest API with Strapi.
The docs provide a detailed guide - using a GitHub client as an example - on how to integrate a third-party client in Strapi.
A pretty common development pattern of a server hook is to have it run an initialization function when the server boots, and then expose its functionality via methods made available either in strapi.services or strapi.hook.
As a result of being available in the Strapi global object, a server hook may also, for instance, be combined with a lifecycle hook, allowing for even further custom functionality.
How to Implement a Server Hook
The code of a server hook goes inside a file named index.js, and should follow the structure below:
module.exports = strapi => {
  const hook = {
    /**
     * Default options
     */
    defaults: {
      // config object
    },

    /**
     * Initialize the hook
     */
    async initialize() {
      // Merge defaults and config/hook.json
      const settings = {...this.defaults, ...strapi.config.hook.settings.**};

      // await someAsyncCode()
    },
  };

  return hook;
};
A server hook can be loaded either from a node module or from the local hooks folder (./hooks) in the project.
Every folder that follows the pattern strapi-hook-* and is located in the ./node_modules folder will be mounted into the strapi.hook object.
Every folder that's inside the ./hooks folder will also be seen as a hook and mounted in the strapi.hook object.
No matter the location from where it is loaded, for a hook to run at the instance boot, it needs to be enabled and configured in your Strapi app.
The ./config/hook.js file is where we enable the hook, alongside any optional custom settings:
module.exports = {
  settings: {
    'hook-name': {
      enabled: true,
    },
  },
};
Let's now examine the implementation specificities of each server hook location.
Node Module Hook
The node module approach is useful if you'd like to publish the hook as an npm package, so that it can be easily shared across multiple projects, and make use of all the features npm provides.
A node module hook requires the following folder structure:
/strapi-hook-[...]
└─── lib
     - index.js
- LICENSE.md
- package.json
- README.md
The index.js file is the entry point to the hook. It has to follow the structure of the index.js example above.
Local Hook
A local hook is a server hook that is imported directly from the ./hooks folder at the root of your project, without having to be installed through npm. It's useful for project-specific hooks that won't be reused in other Strapi projects.
To add a local hook to your project, create a folder with the name of the hook and a index.js file inside it:
/project
└─── admin
└─── api
└─── config
│    - hook.js
└─── hooks
│   └─── strapi-my-local-hook
│        - index.js
└─── public
- favicon.ico
- package.json
- server.js
Webhooks
Finally, we get to the last type of hooks: webhooks.
Sunny Hsiao wrote an article specifically about webhooks, going more in-depth than I will in this general overview, so I recommend you check it out if you'd like to dive deeper into webhooks.
Webhooks are not exclusive to Strapi. An application that implements webhooks is able to notify other applications as a certain event occurs in its context.
Technically, webhooks are typically implemented as HTTP POST requests.
Use Case Examples
A webhook can be a great tool to notify third-party providers to run CI/CD operations, such as build or deploy.
Recently, I've come across a very interesting use case in this Strapi webinar by Charles Ouellet, where a webhook is used to rebuild a Nuxt static site whenever the content is updated in Strapi.
How to Configure a Webhook
The webhook configuration panel is accessible from the Admin Panel, from the sidebar, in Settings -> Webhooks.
To create a new webhook, click the Add new webhook button in the top-right of the panel:
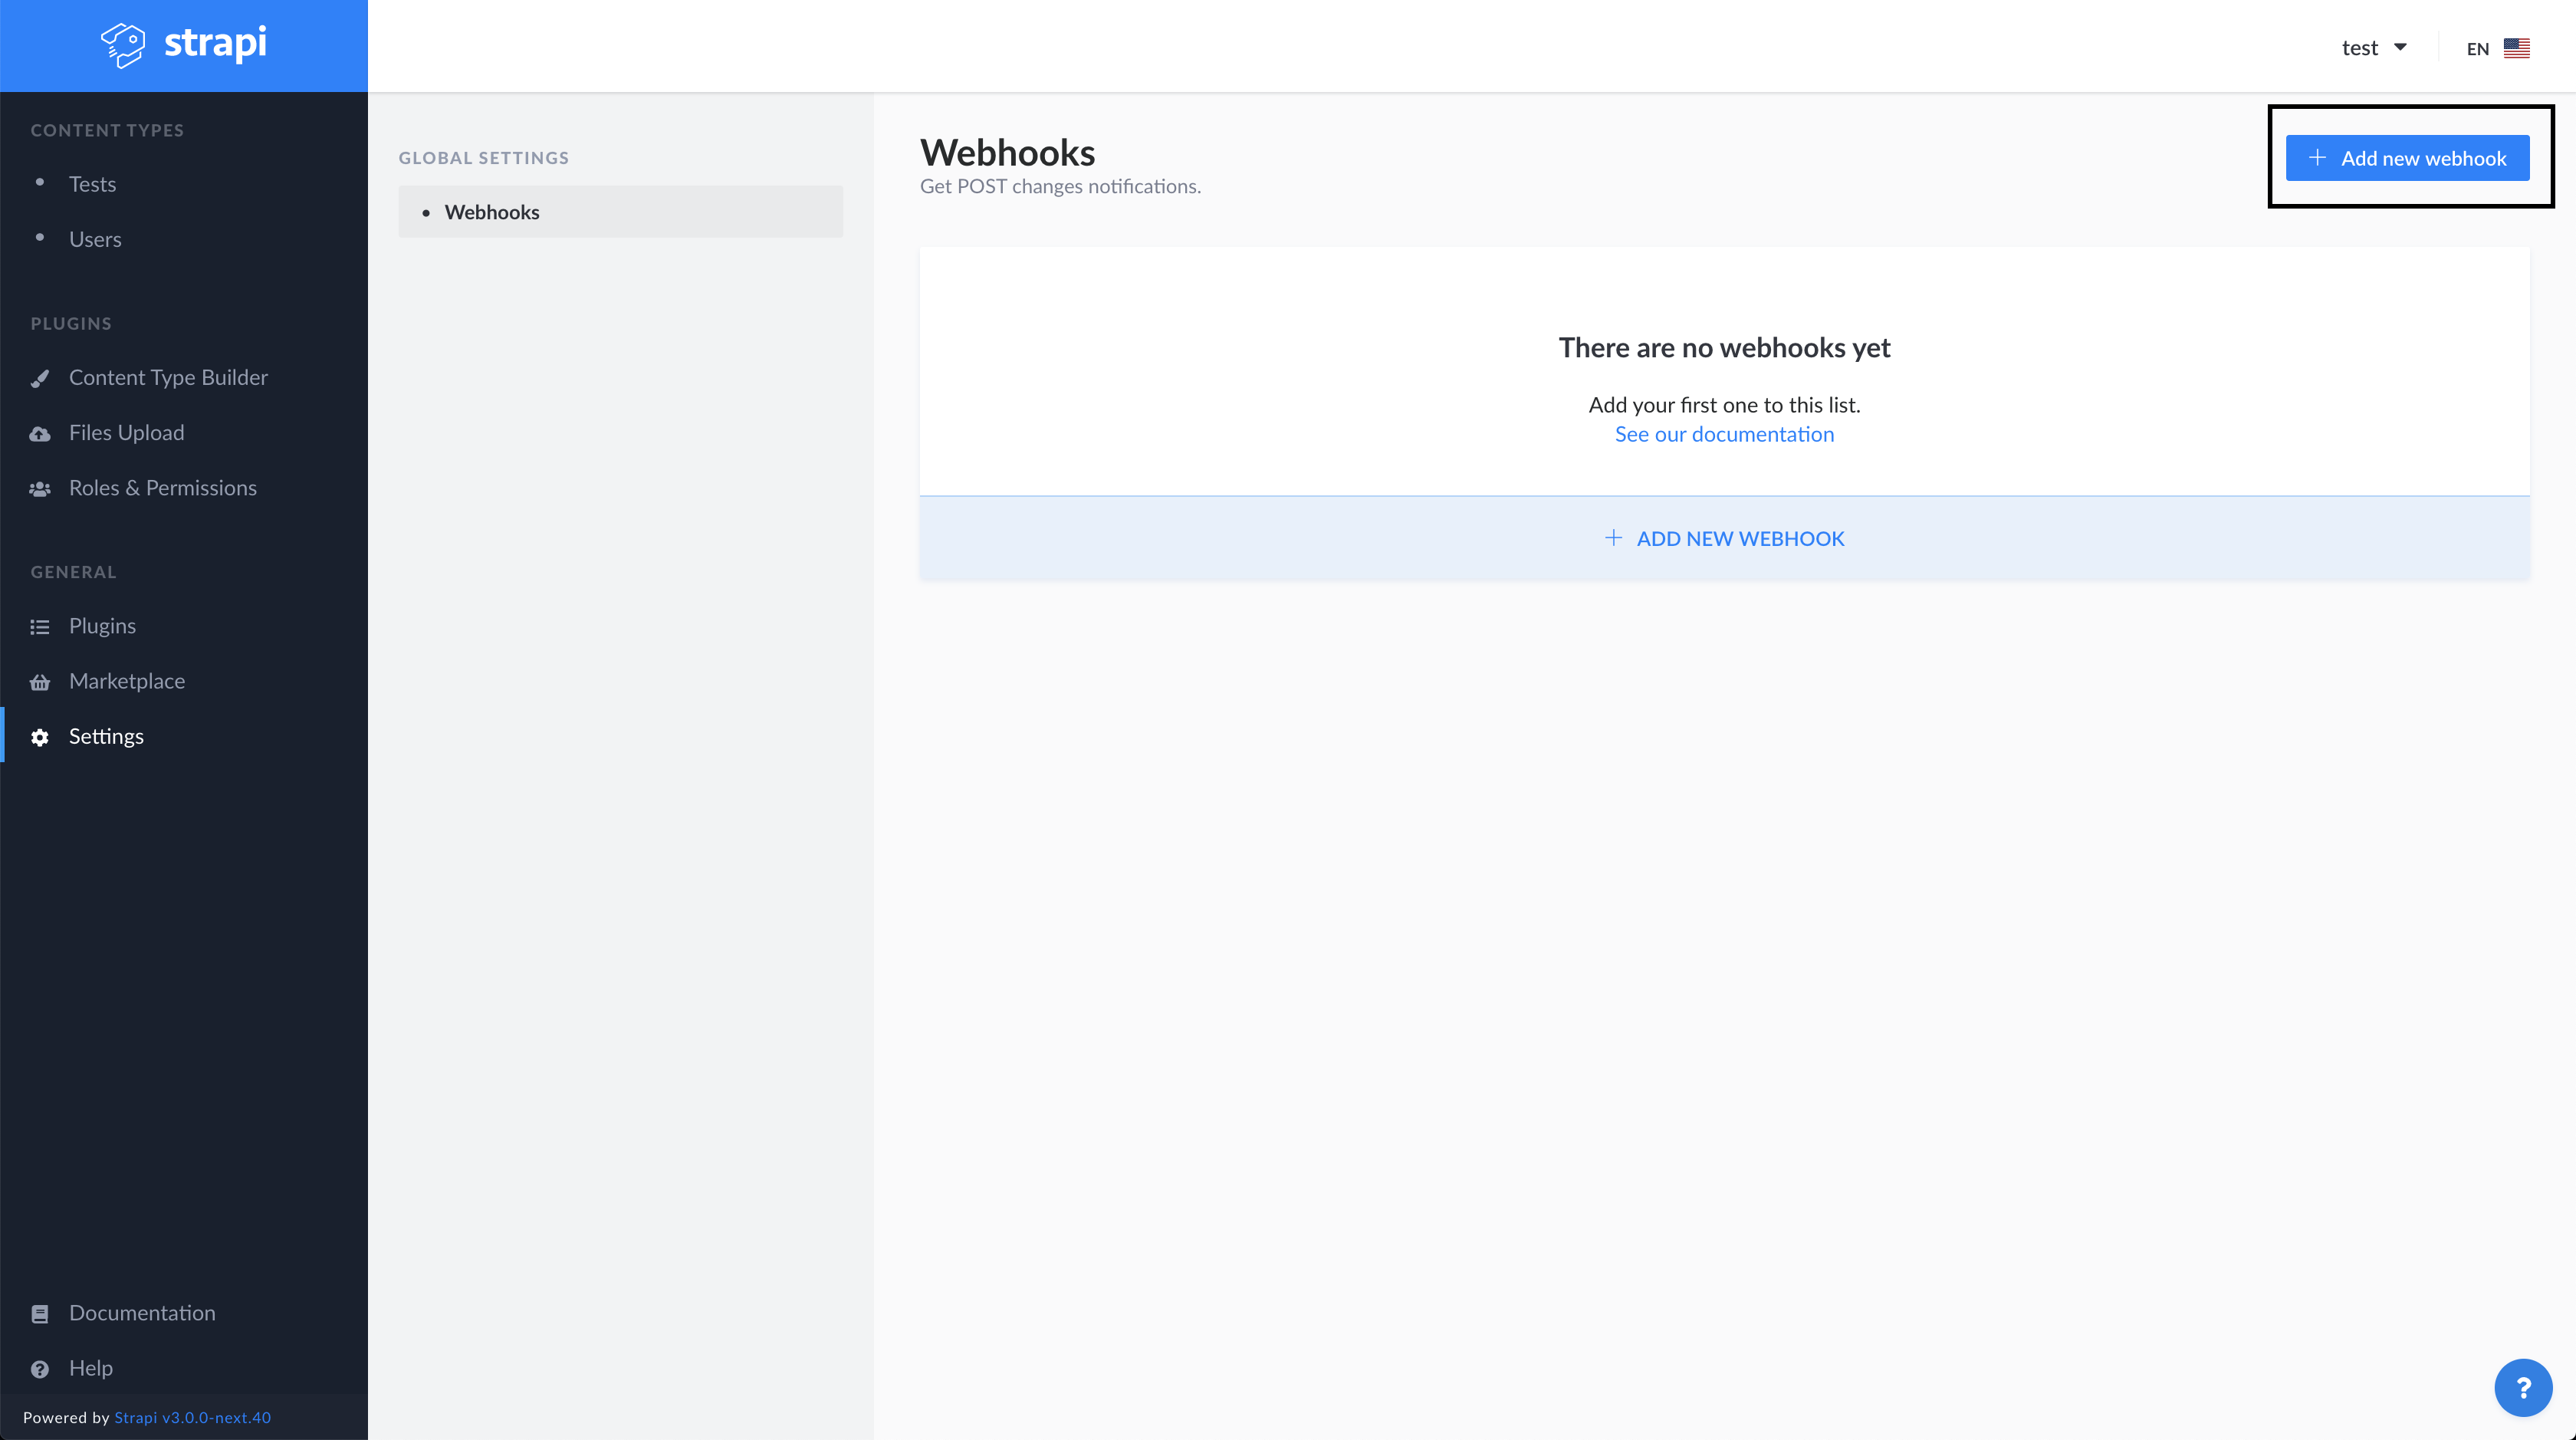
Next, you'll need to fill in the Create a webhook form with the following fields:
- Name
- URL
- Request headers
- Trigger events
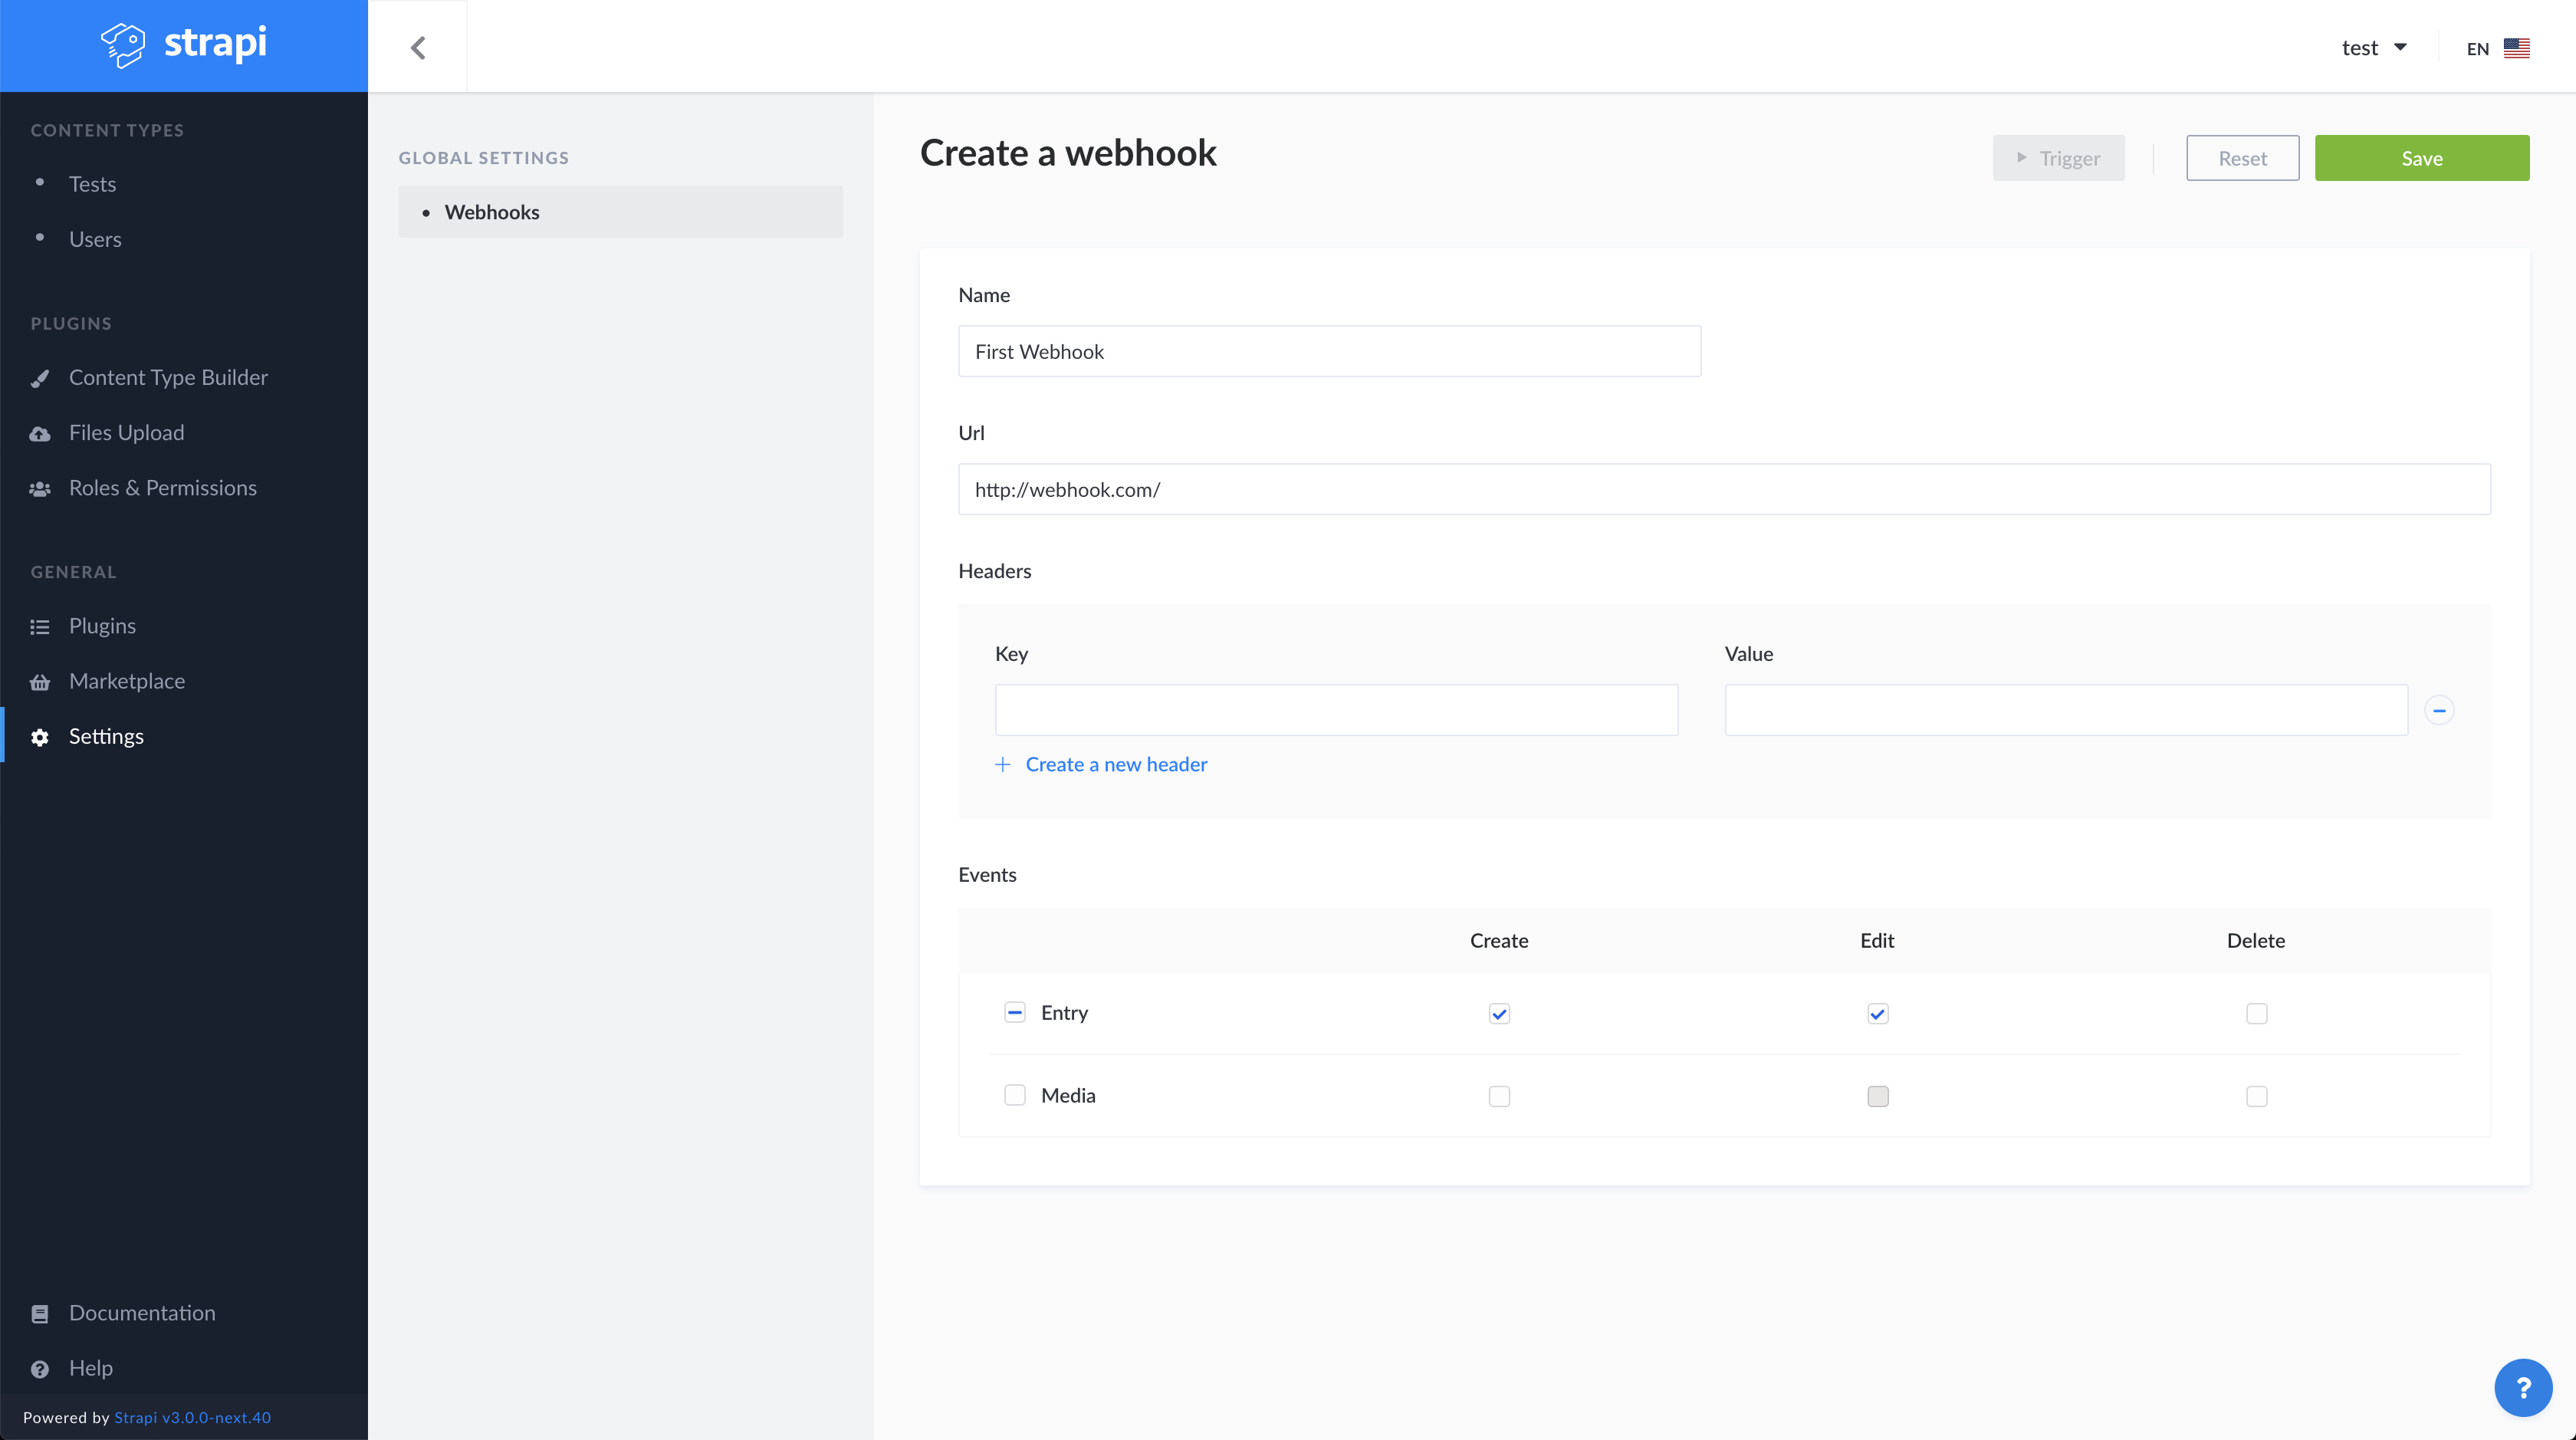
By default, Strapi provides a set of events that can trigger a webhook. These events are related to either a Content-Type entry or to a media asset.
For Content-Type entries, we have the following events available:
create: When an entry is created.update: When an entry is updated.delete: When an entry is deleted.publish: When an entry is published (available when draft and publish is enabled on the Content-Type).unpublish: When an entry is unpublished (available when draft and publish is enabled on the Content-Type).
For media assets:
create: When a media asset is created.update: When a media asset is updated.delete: When a media asset is deleted.
Here's how a sample webhook payload looks like:
{
  "event": "entry.create",
  "created_at": "2020-01-10T08:47:36.649Z",
  "model": "address",
  "entry": {
    "id": 1,
    "geolocation": {},
    "city": "Paris",
    "postal_code": null,
    "category": null,
    "full_name": "Paris",
    "created_at": "2020-01-10T08:47:36.264Z",
    "updated_at": "2020-01-10T08:47:36.264Z",
    "cover": null,
    "images": []
  }
}
You can also set additional webhook global header configurations. This is done in the ./config/server.js file and will be applied to all the outgoing webhooks:
module.exports = {
  webhooks: {
    defaultHeaders: {
      'Custom-Header': 'my-custom-header',
    },
  },
};
If it's an Authorization header, you can use Authorization: 'Bearer my-very-secured-token', instead.
This will allow the notified applications to read the header and appropriately handle verification and authentication.
Besides the explicitly configured headers, Strapi will also add another header named X-Strapi-Event, where the corresponding value is the name of the event type that was triggered.
Conclusion
As we've seen, hooks are a great tool for customizing and extending Strapi's core functionality.
We've examined the three different types of Strapi hooks, presenting the main use cases for each type, when to use one or another, and how to implement them.
I'd like to thank malgamves for reviewing this article, as well as MattieBelt and yringler for the use case suggestions.
If you have any cool use cases of Strapi hooks you'd like to share, you're very welcome to join the ongoing conversation in the forum.