(This article was originally published on strapi.io).
This is a step-by-step guide on how to implement Strapi-based authentication in a Nuxt.js app.
Here's a preview of what we're setting to achieve:
In essence, authentication is the process through which a website or app verifies the identity of its users.
As the gatekeeper to an app, authentication needs to be secure and reliable. After all, it deals with user information, potentially the most critical data in an app.
Implementing a secure authentication mechanism from scratch is hard and can quickly become cumbersome. Where do you save the user data? Should you roll out a database and model the user content type? What about registration, login, and password reset?
But it doesn't end there. How to securely deal with passwords? Hashing and all that fun stuff 😵.
That's a lot to think about, when you just want to dive into the core functionality of the app you're developing!
You could build your own authentication mechanism, but do you really need or want to? I'd say, better to rely on something that's already built and thoroughly tested before.
Strapi is an awesome open source Node.js headless CMS, backed by a large, active community.
One of the cool things about Strapi is that it provides authentication right out of the box, with built-in admin and user content types and API endpoints to perform the main authentication operations.
On the frontend, we'll be using Nuxt.js and relying on Nuxt's Auth Module, which is the official zero-boilerplate authentication module for Nuxt.js.
So, in this article, we'll be building two projects:
- Backend: Strapi app to store and manage users
- Frontend: Nuxt app that will use Strapi's API for authentication purposes
The source code for both projects can be found on GitHub:
Strapi's authentication scheme is based on email/username and password credentials, along with JWT tokens. Upon successful authentication, the response will return a JWT authentication token that will be added to subsequent API requests. The Auth Module will conveniently help us manage this workflow.
We will also be implementing some basic authorization features, such as restricting certain pages to only logged in/out users.
This guide builds on top of Chimezie Enyinnaya's awesome work, adapting it to Strapi's specific use case, and adding also the following features:
- Email confirmation for registration
- Password reset
- Token expiration strategy
I won't go into detailed explanation at every step. Instead, I'll focus on Strapi and the new functionality. For everything else, I recommend you refer to Chimezie's tutorial and the Auth Module documentation.
Pre-requisites
To follow this tutorial, make sure you have Node.js installed:
- Node.js 12.x
- npm 6.x
Although not required, a basic knowledge of Strapi, Nuxt.js, and JWT fundamentals is recommended.
Disclaimer: this tutorial was written based on Strapi 3.0.1 (stable release) and Nuxt.js 2.12.2. It should work on different versions too, but you may need to make some adaptations here and there.
Let's get started!
Install Strapi
First things first, we begin by creating a Strapi project:
npx create-strapi-app strapi-users --quickstart
We've used the --quickstart flag that installs Strapi with default settings.
It also tells Strapi to use SQLite as the database engine and automatically run
our application.
In our installation, we used the default database, SQLite, because it doesn’t require a dedicated database server. Instead, the database is just a single file. For the sake of convenience, we'll be using it in this tutorial, but the steps in this guide also apply to different database engines.
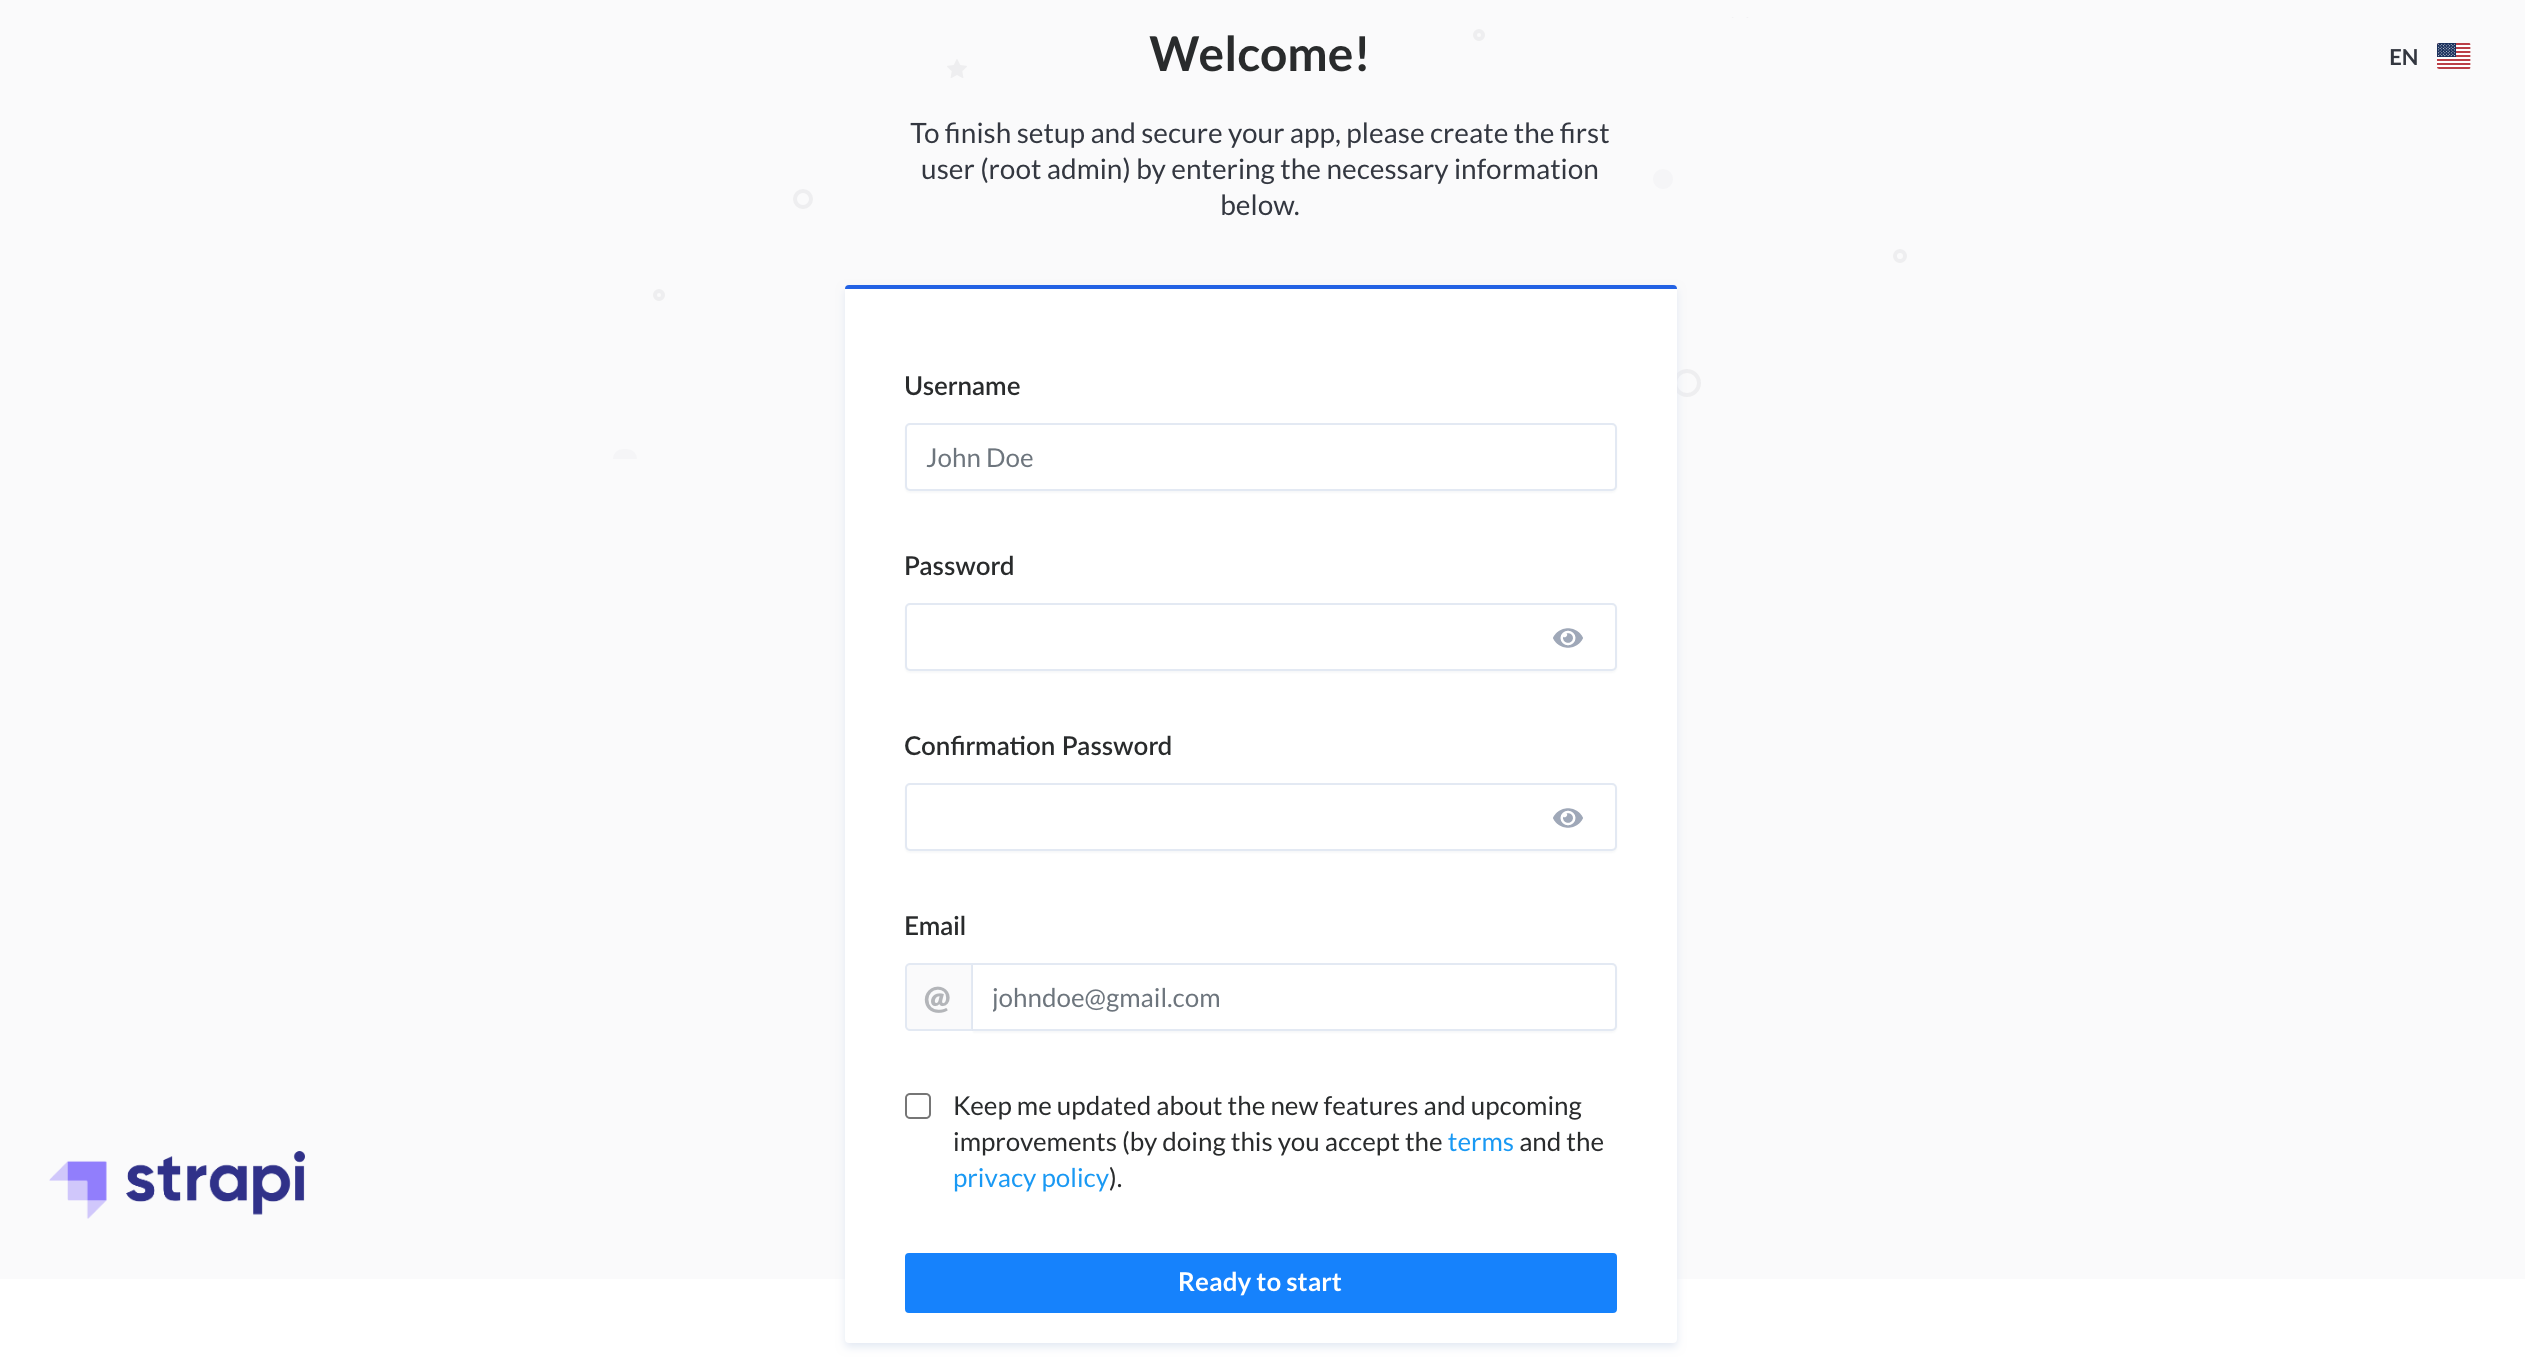
Once the installation is done, Strapi will automatically be launched in your browser, asking you to create an administrator account.
To finish the setup and secure your app, go ahead and create a root/admin user, by filling-in the necessary information:
From now on, you can access Strapi's local Admin interface by visiting http://localhost:1337/admin.
Enable email confirmation
By default, the user registration process in Strapi does not include email confirmation.
To enable it, from the left sidebar of the Admin dashboard, click Roles & Permissions. Select the Advanced Settings tab, enable the "Enable email confirmation" option and save:

Email console provider
Thanks to Strapi's Email plugin, we can have a Strapi instance send emails from our server's local email system or from an external provider (e.g., SendGrid).
Email setup and configuration is not within the scope of this article. We just want to make sure that the emails are being fired when expected and inspect their content.
For that, we're going to use strapi-provider-email-console, a Strapi email mock provider used in development, that instead of sending, outputs the emails to the console.
Stop the Strapi app that's running, navigate to the project's root directory, and install the email mock provider:
cd strapi-users
npm install strapi-provider-email-console
Once the installation is done, you'll need to add in the provider. Create the
file ./config/plugins.js and paste the following code:
module.exports = ({ env }) => ({
  email: {
    provider: "console",
  },
});
Since we've used --quickstart the first time we ran our Strapi app, before
running it in development mode, we need to install the dependencies:
npm install
Once that's done, start the Strapi app in development mode with the command:
npm run develop
Create a Nuxt app
Now, let's change gears and focus on the frontend app. It will be a Server-Side Rendered "Universal" Nuxt.js app.
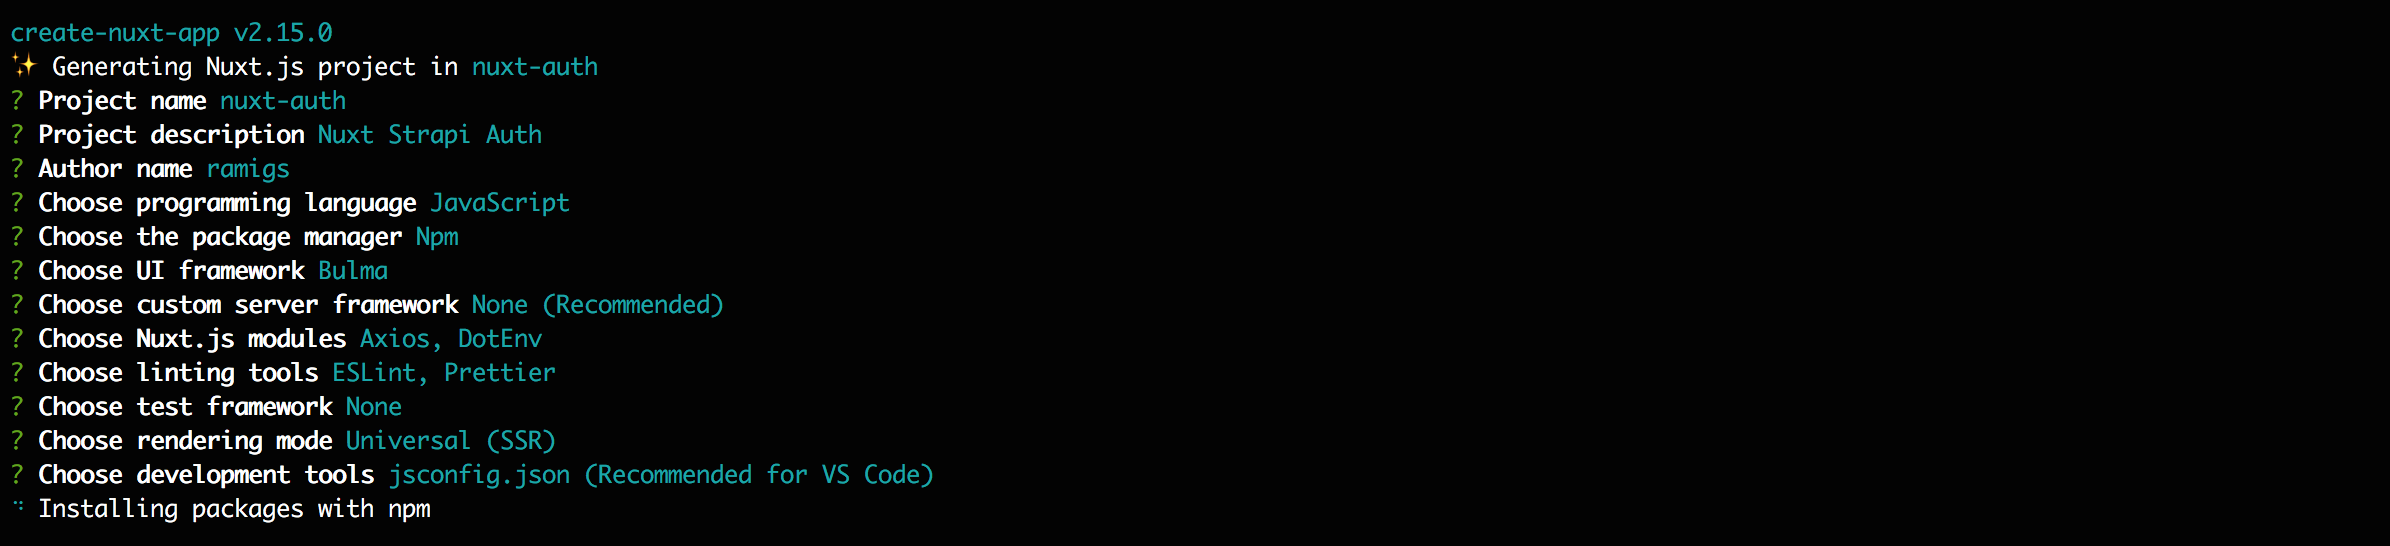
To get started quickly, open a new terminal and create the project using Nuxt's scaffolding tool:
npx create-nuxt-app nuxt-auth
Go through the guide and make sure to select following options:
- axios and dotenv in the Nuxt.js modules step
- Bulma CSS in the UI framework step, which we'll use to style our app
Strapi's API URL will vary depending on the environment. So, we want to have it dynamically loaded from an environment variable.
Once the tool finishes creating the app, edit the .env file in the project's
root directory, adding a new environment variable that points to the URL of the
Strapi app that's running locally:
API_AUTH_URL=http://localhost:1337
Next, navigate to the project's root directory and install the required Nuxt Auth module dependency:
cd nuxt-auth
npm install @nuxtjs/auth
Once the installation is done, add the module @nuxtjs/auth in
./nuxt.config.js:
modules: [
  // Doc: https://github.com/nuxt-community/modules/tree/master/packages/bulma
  '@nuxtjs/bulma',
  // Doc: https://axios.nuxtjs.org/usage
  '@nuxtjs/axios',
  // Doc: https://github.com/nuxt-community/dotenv-module
  '@nuxtjs/dotenv',
  '@nuxtjs/auth'
],
At the top of nuxt.config.js, add also the following code to load the
environment variables:
require("dotenv").config();
One last step we need to do in this file. Configure the base URL that axios will use when making API requests. In our case, this corresponds to the environment variable we've added previously:
axios: {
  baseURL: process.env.API_AUTH_URL
},
Configure Nuxt Auth
The Auth module uses Vuex's state management to store the user authentication status and user info.
Enable the Vuex store by creating a file ./store/index.js with the store
getters:
export const getters = {
  isAuthenticated(state) {
    return state.auth.loggedIn;
  },

  loggedInUser(state) {
    return state.auth.user;
  },
};
Now we are ready to configure the Auth module. The default, general purpose
authentication scheme - supporting Cookie and JWT login flows - is named
local. Let's now map its endpoints with Strapi's authentication endpoints.
Paste the code below into ./nuxt.config.js:
/*
 ** Auth module configuration
 ** See https://auth.nuxtjs.org/schemes/local.html#options
 */
auth: {
  strategies: {
    local: {
      endpoints: {
        login: {
          url: 'auth/local',
          method: 'post',
          propertyName: 'jwt'
        },
        user: {
          url: 'users/me',
          method: 'get',
          propertyName: false
        },
        logout: false
      }
    }
  }
},
We've set up two endpoints:
login: authenticates the user. On successful authentication, the JWT token will be available in thejwtproperty of the response object.user: retrieves the authenticated user's info. If the user is authenticated, the JWT token will be added to the request, allowing Strapi to identify the user. Since the response object is already the user info itself, we setpropertyNametofalse.
We've also disabled the logout endpoint, since logging out a user is only done
locally, and doesn't require any request to Strapi's API. The token is simply
removed the from the local storage when the user logs out.
Navbar Component
Create a file ./components/Navbar.vue with the following code:
<template>
  <nav class="navbar" role="navigation" aria-label="main navigation">
    <div class="navbar-brand">
      <nuxt-link class="navbar-item" to="/">Home</nuxt-link>

      <a
        role="button"
        class="navbar-burger burger"
        aria-label="menu"
        aria-expanded="false"
        data-target="navbarBasicExample"
      >
        <span aria-hidden="true"></span>
        <span aria-hidden="true"></span>
        <span aria-hidden="true"></span>
      </a>
    </div>

    <div id="navbarBasicExample" class="navbar-menu">
      <div v-if="isAuthenticated" class="navbar-start">
        <div class="navbar-item has-dropdown is-hoverable">
          <a class="navbar-link">

          </a>

          <div class="navbar-dropdown">
            <a class="navbar-item" href="/profile">My Profile</a>
            <hr class="navbar-divider" />
            <a class="navbar-item" @click="logout">Logout</a>
          </div>
        </div>
      </div>

      <div v-if="!isAuthenticated" class="navbar-end">
        <div class="navbar-item">
          <div class="buttons">
            <nuxt-link class="button is-primary" to="/register">
              <strong>Register</strong>
            </nuxt-link>
            <nuxt-link class="button is-light" to="/login">
              Log in
            </nuxt-link>
          </div>
        </div>
      </div>
    </div>
  </nav>
</template>
Let us make the component functional by adding the following <script></script>
code:
<script>
import { mapGetters } from "vuex";

export default {
  computed: {
    ...mapGetters(["isAuthenticated", "loggedInUser"]),
  },
  mounted() {
    // Get all "navbar-burger" elements
    const $navbarBurgers = Array.prototype.slice.call(
      document.querySelectorAll(".navbar-burger"),
      0
    );
    // Check if there are any navbar burgers
    if ($navbarBurgers.length > 0) {
      // Add a click event on each of them
      $navbarBurgers.forEach((el) => {
        el.addEventListener("click", () => {
          // Get the target from the "data-target" attribute
          const target = el.dataset.target;
          const $target = document.getElementById(target);
          // Toggle the "is-active" class on both the "navbar-burger" and the "navbar-menu"
          el.classList.toggle("is-active");
          $target.classList.toggle("is-active");
        });
      });
    }
  },
};
</script>
We've defined the computed properties isAuthenticated and loggedInUser used
in the component's template. These are mapped from the previously created store
getters.
The code in the mounted hook comes from Bulma's Navbar
documentation. Its purpose
is to toggle the display of the navbar-menu when the navbar-burger icon is
clicked.
The navbar burger menu is displayed on smaller screen sizes.
Default Layout
Edit ./layouts/default.vue and replace its content with the following:
<template>
  <div>
    <Navbar />
    <nuxt />
  </div>
</template>

<script>
import Navbar from "~/components/Navbar";

export default {
  components: {
    Navbar,
  },
};
</script>
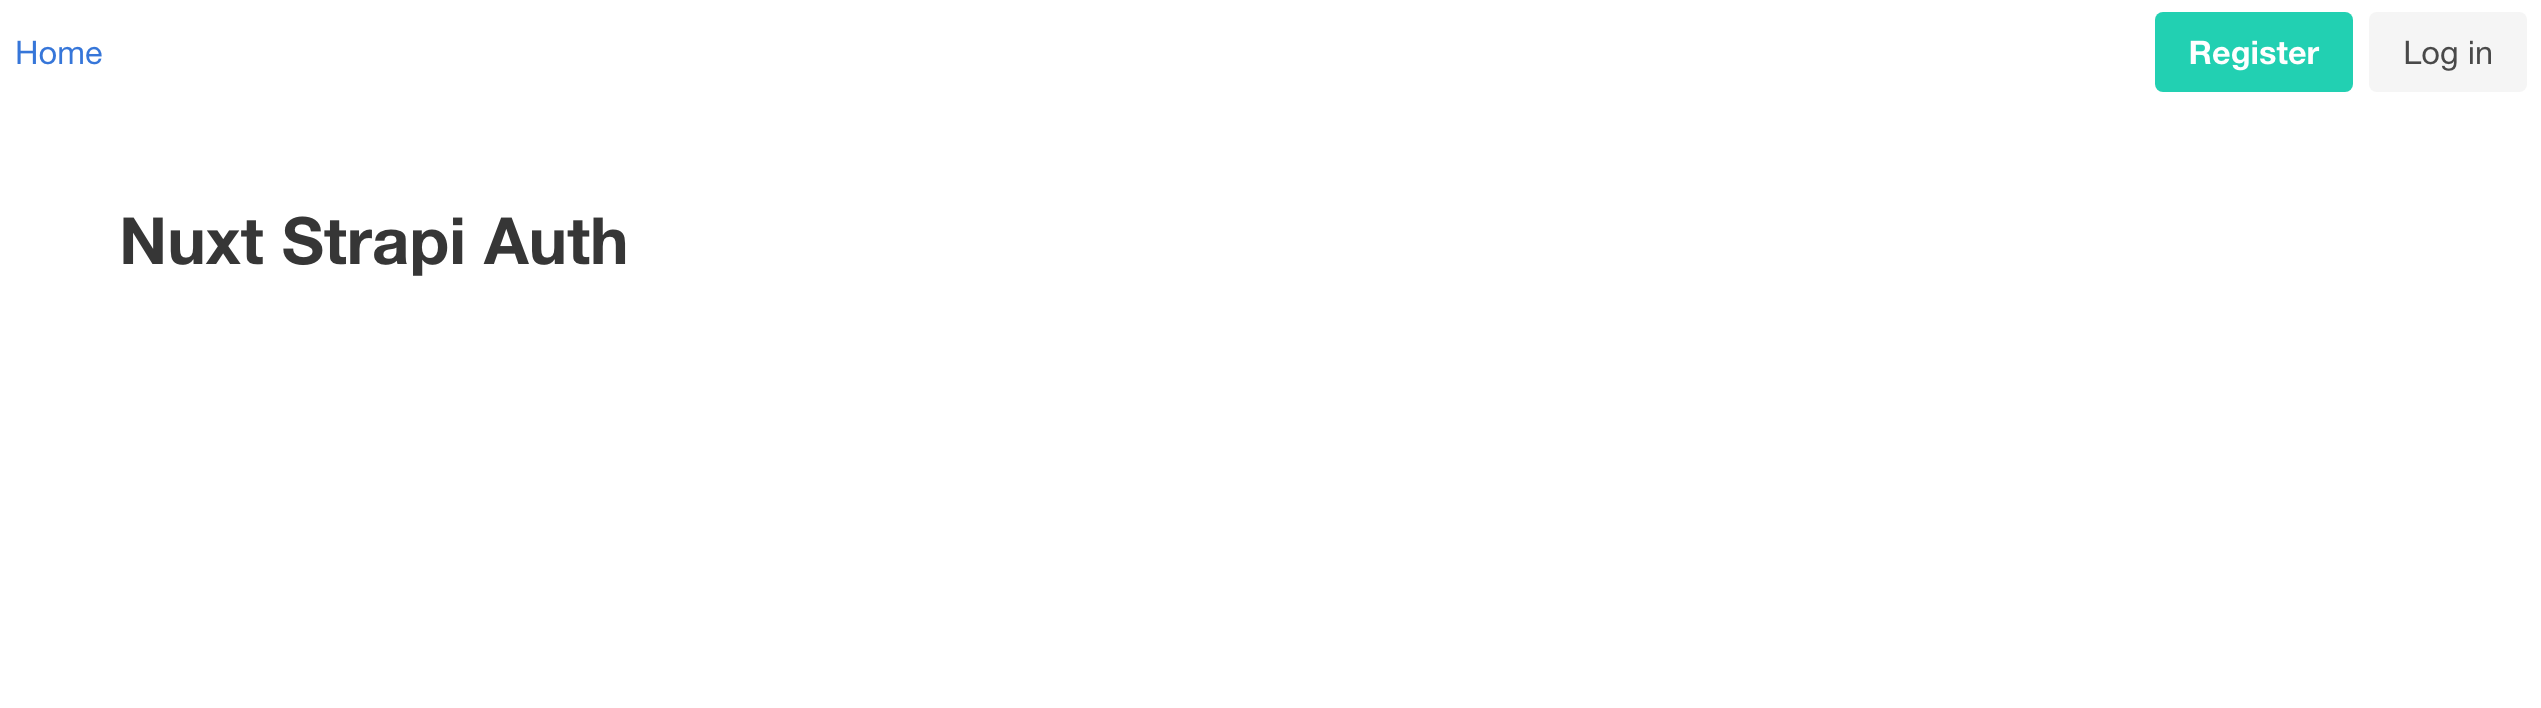
Homepage
Edit ./pages/index.vue and replace its content with the following:
<template>
  <section class="section">
    <div class="container">
      <h1 class="title">Nuxt Strapi Auth</h1>
    </div>
  </section>
</template>
This is what we have so far:
Notification Component
Let’s create a Notification component to give feedback to the user.
If everything goes as expected it should display a success message. Otherwise, an error message should be displayed.
Create a file ./components/Notification.vue and paste into it the code below:
<template>
  <div :class="`is-${type}`" class="notification">

  </div>
</template>

<script>
export default {
  name: "Notification",
  props: {
    type: {
      type: String,
      default: "success",
      validator: (val) => ["danger", "success"].includes(val),
    },
    message: {
      type: String,
      default: "",
    },
  },
};
</script>
Register
Create a file ./pages/register.vue and paste into it the code below:
<template>
  <section class="section">
    <div class="container">
      <div class="columns">
        <div class="column is-4 is-offset-4">
          <h2 class="title has-text-centered">Register</h2>

          <Notification v-if="success" type="success" :message="success" />
          <Notification v-if="error" type="danger" :message="error" />

          <form v-if="!success" method="post" @submit.prevent="register">
            <div class="field">
              <label class="label">Username</label>
              <div class="control">
                <input
                  v-model="username"
                  type="text"
                  class="input"
                  name="username"
                  required
                />
              </div>
            </div>
            <div class="field">
              <label class="label">Email</label>
              <div class="control">
                <input
                  v-model="email"
                  type="email"
                  class="input"
                  name="email"
                  required
                />
              </div>
            </div>
            <div class="field">
              <label class="label">Password</label>
              <div class="control">
                <input
                  v-model="password"
                  type="password"
                  class="input"
                  name="password"
                  required
                />
              </div>
            </div>
            <div class="control">
              <button type="submit" class="button is-dark is-fullwidth">
                Register
              </button>
            </div>
          </form>

          <div class="has-text-centered" style="margin-top: 20px">
            Already got an account? <nuxt-link to="/login">Login</nuxt-link>
          </div>
        </div>
      </div>
    </div>
  </section>
</template>

<script>
import Notification from "~/components/Notification";

export default {
  components: {
    Notification,
  },
  data() {
    return {
      username: "",
      email: "",
      password: "",
      success: null,
      error: null,
    };
  },
  methods: {
    async register() {
      this.error = null;
      try {
        this.$axios.setToken(false);
        await this.$axios.post("auth/local/register", {
          username: this.username,
          email: this.email,
          password: this.password,
        });
        this.success = `A confirmation link has been sent to your email account. \
        Please click on the link to complete the registration process.`;
      } catch (e) {
        this.error = e.response.data.message[0].messages[0].message;
      }
    },
  },
};
</script>
Before making the request to Strapi's register endpoint, we make sure no token is added as a request header.
Redirect after confirmation
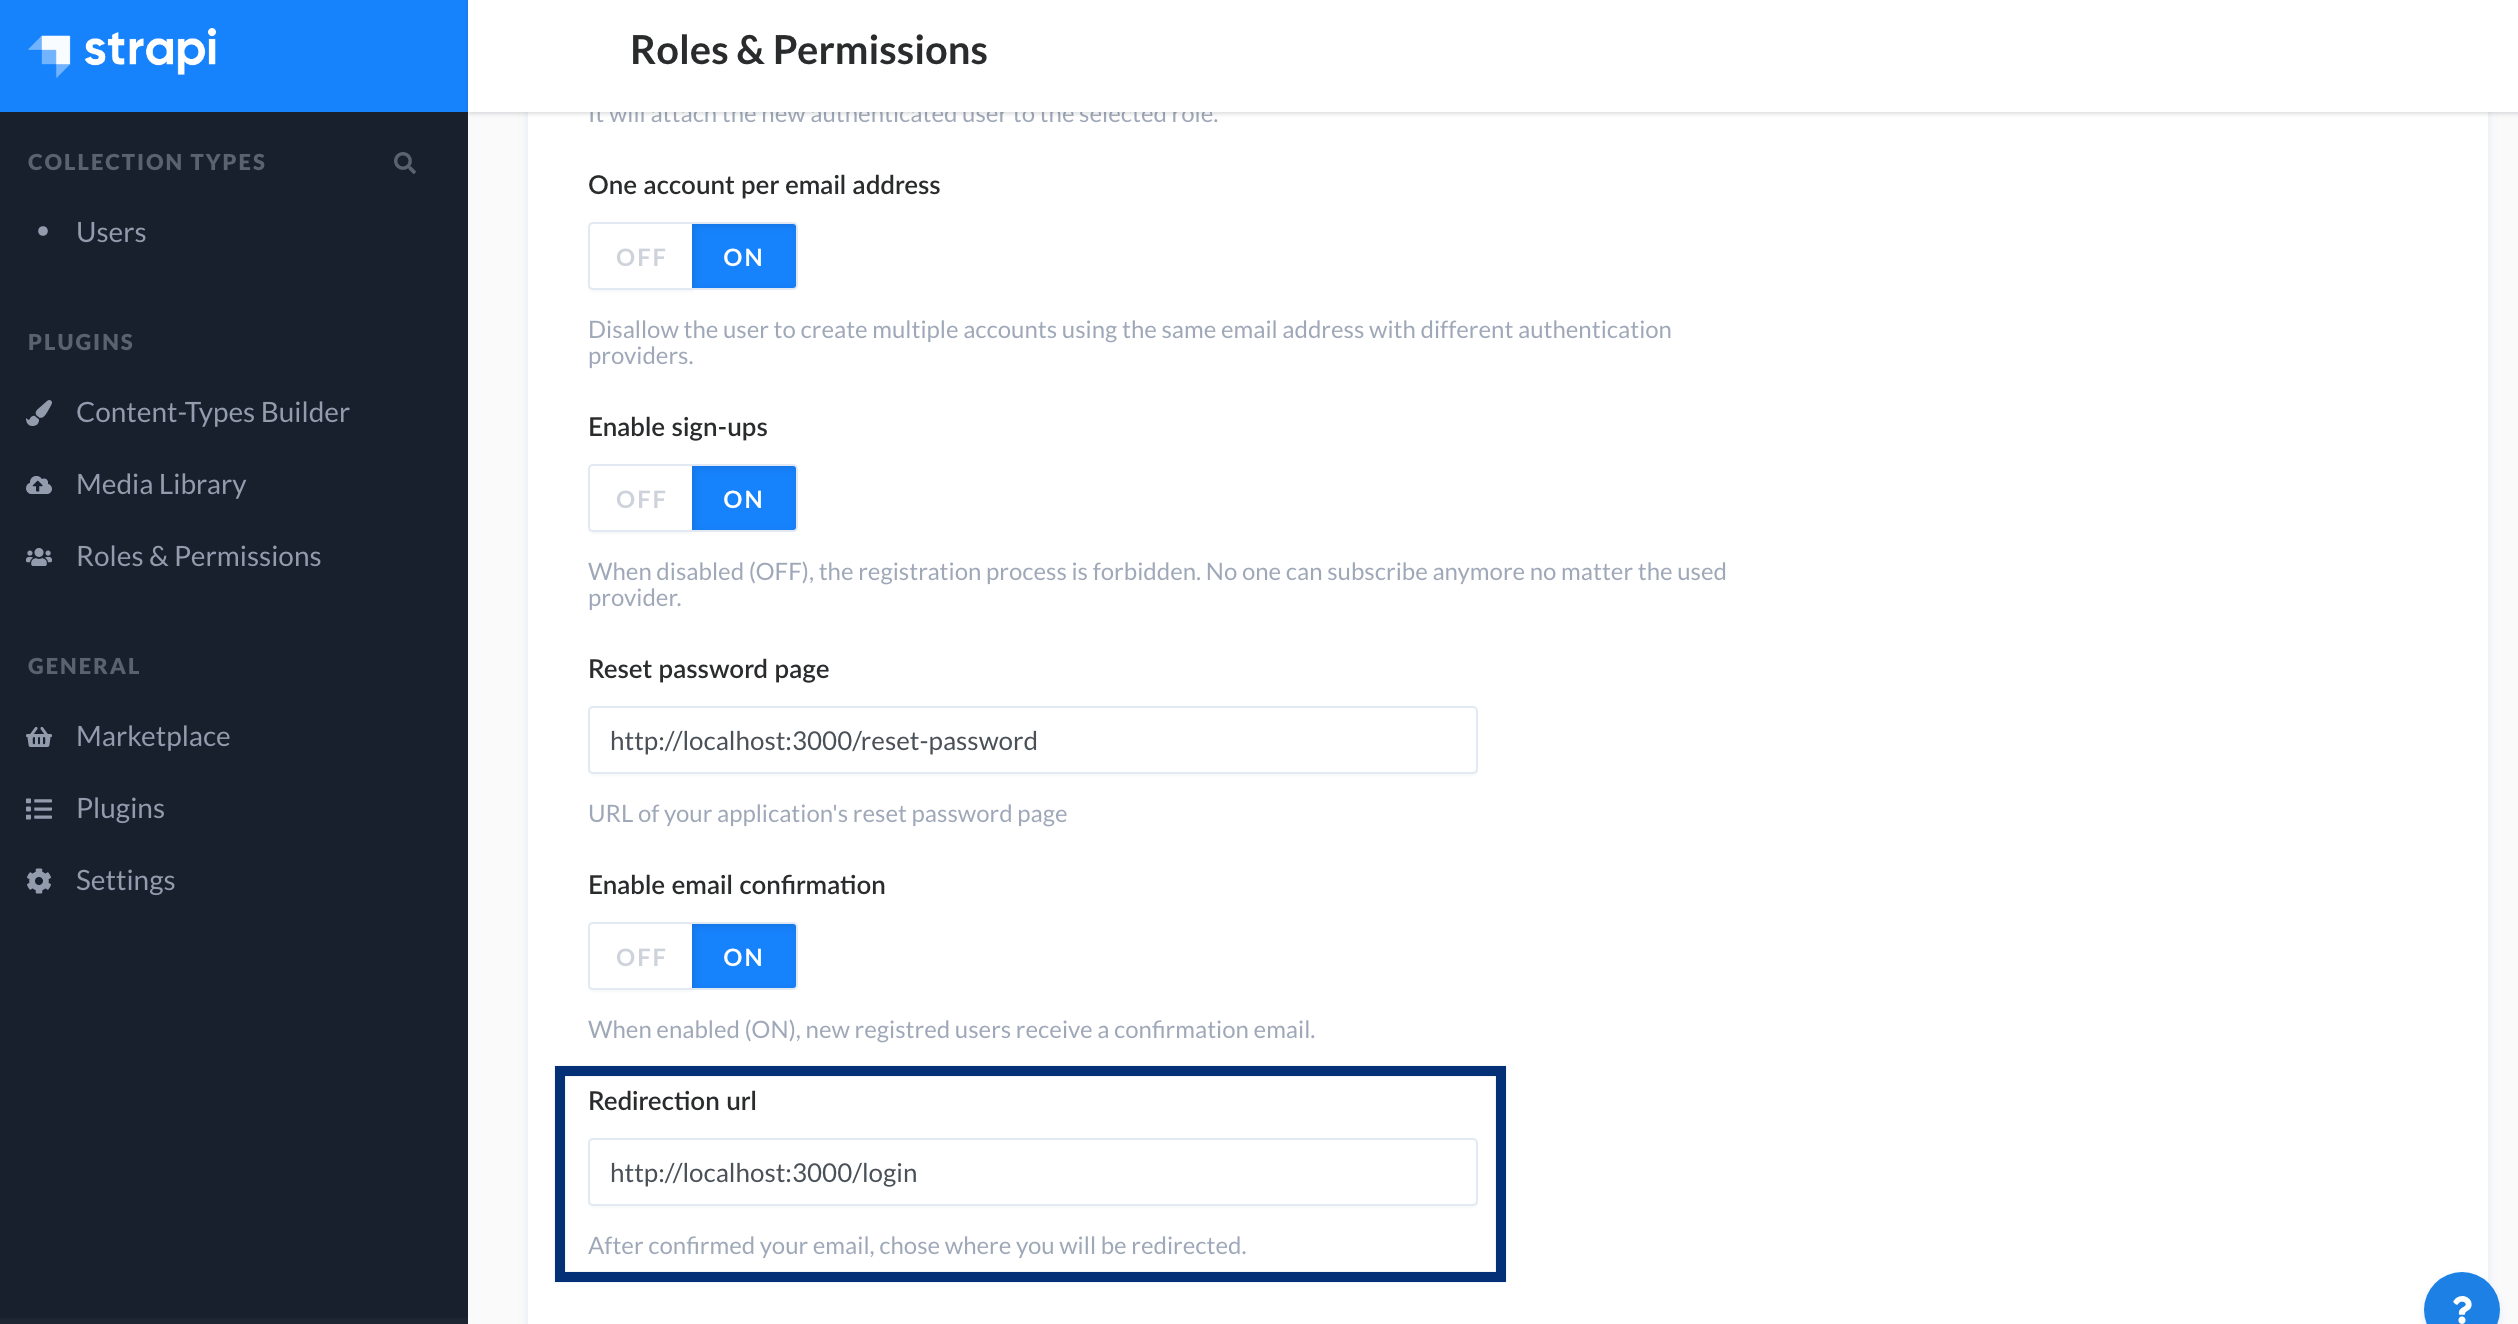
Before we can test the register feature, we need to tell Strapi where to redirect the user after the confirmation link is accessed.
To specify this link, from the left sidebar of the Admin dashboard, click
Roles & Permissions. Select the Advanced Settings tab, paste
http://localhost:3000/login in the "Redirection url" input, and save:
Configure Strapi's Server URL
We also need to configure Strapi's public URL. This URL will be used to prefix the confirmation link that's sent.
Inside the Strapi project root folder, create a .env file by copying it from
.env.example:
cp .env.example .env
Edit .env and add the URL environment variable:
URL=http://localhost:1337
Edit ./config/server.js and add the url property:
url: env("URL", "http://localhost:1337"),
Note that we've set this configuration in the development environment. In production, you'll probably want to have SSL, so you'll also need to install and configure an upstream proxy application, such as Nginx - and make Strapi aware of it.
Testing Register
We're now ready to test the register feature.
Open a new terminal - so that the Strapi app is still running - and run the Nuxt app in development mode:
npm run dev
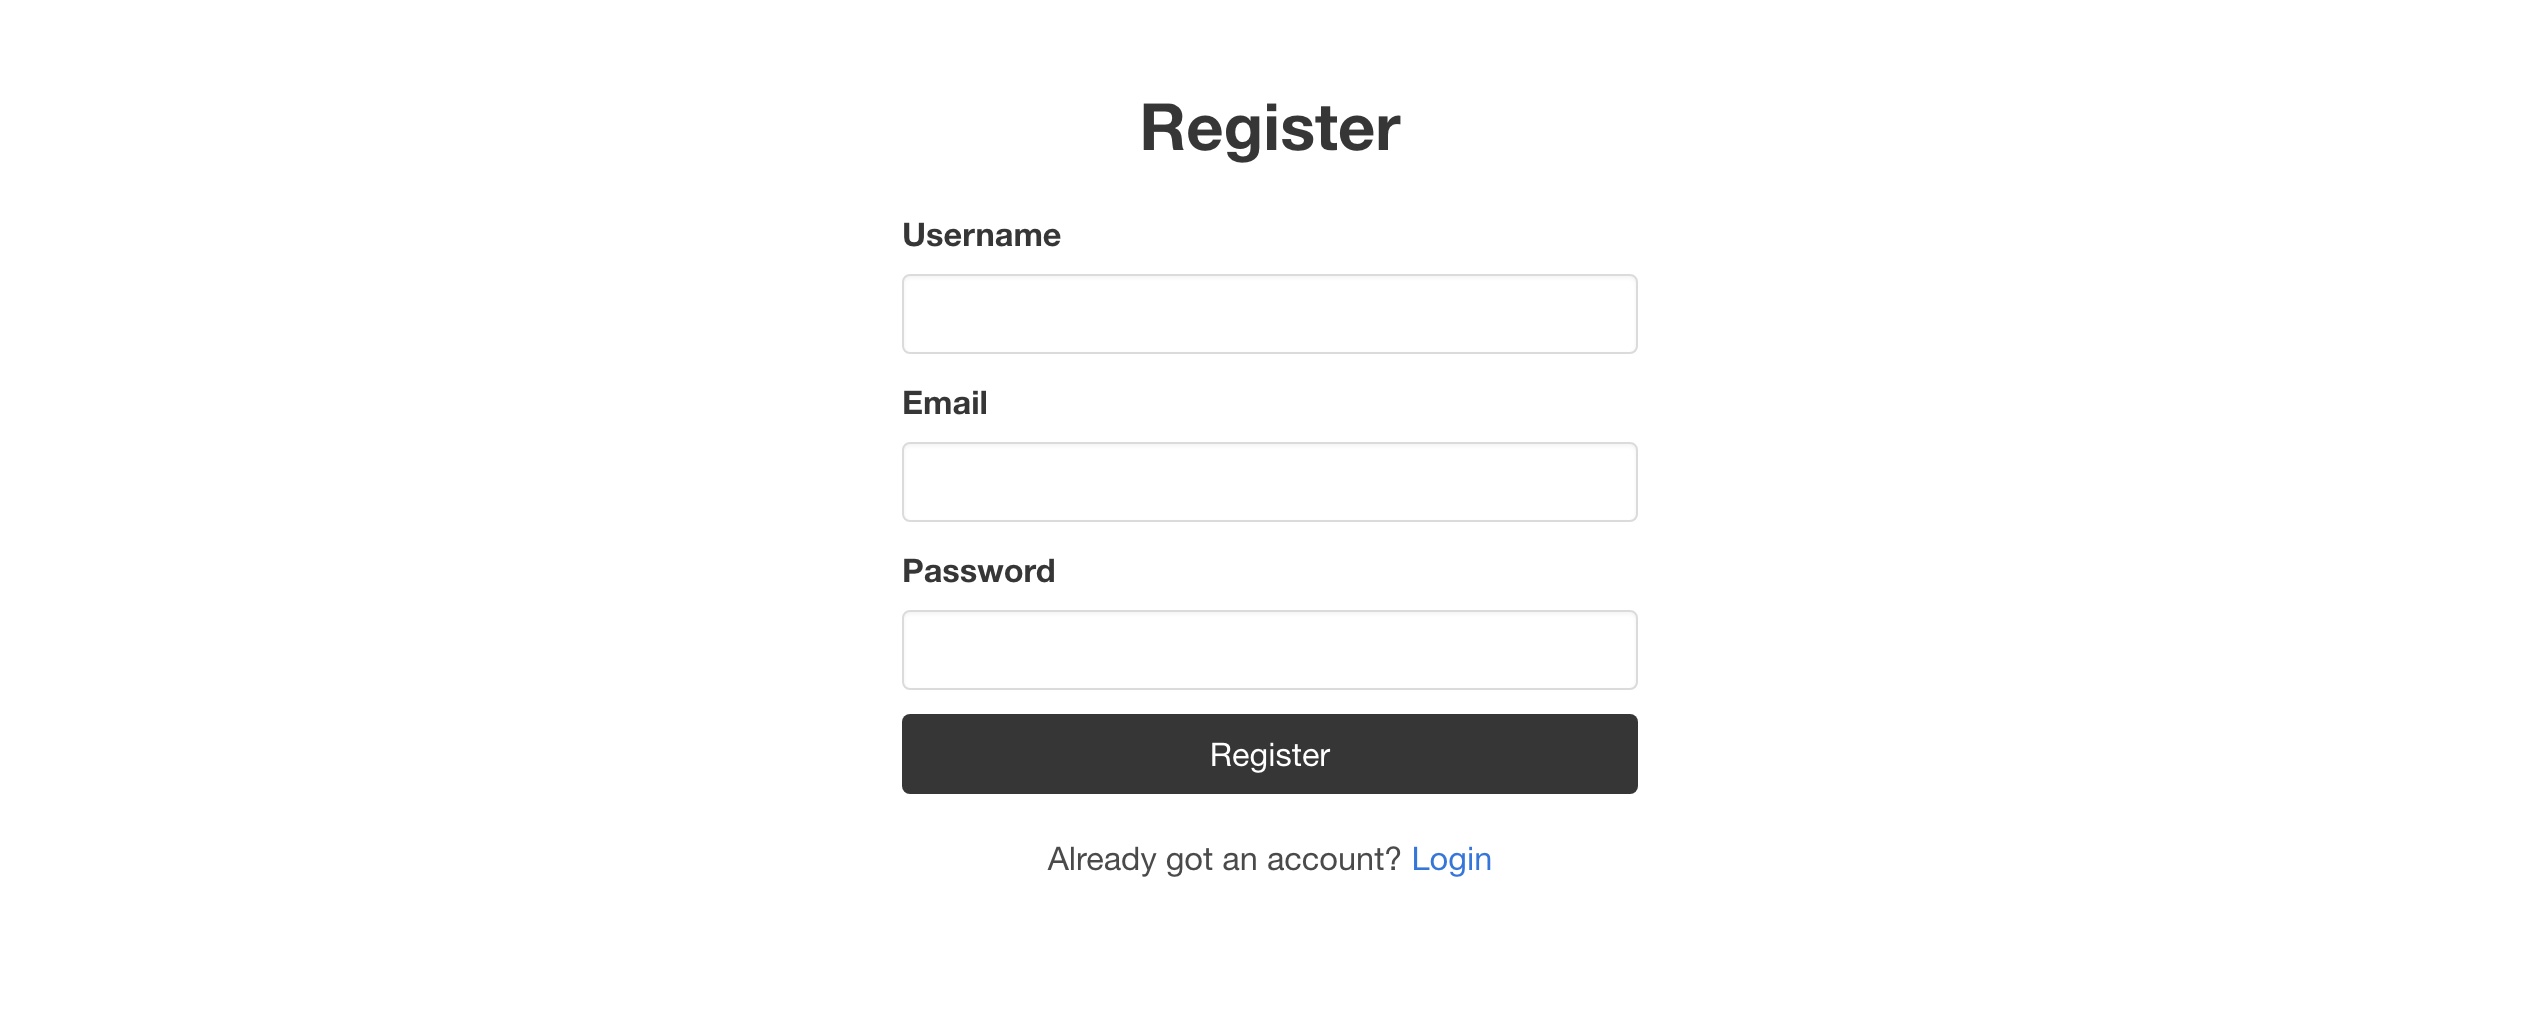
Navigate to http://localhost:3000/register and register a user:
If the registration was successful, a success message is displayed by the Notification component, requesting that the user completes the registration process by clicking the confirmation link that was sent:

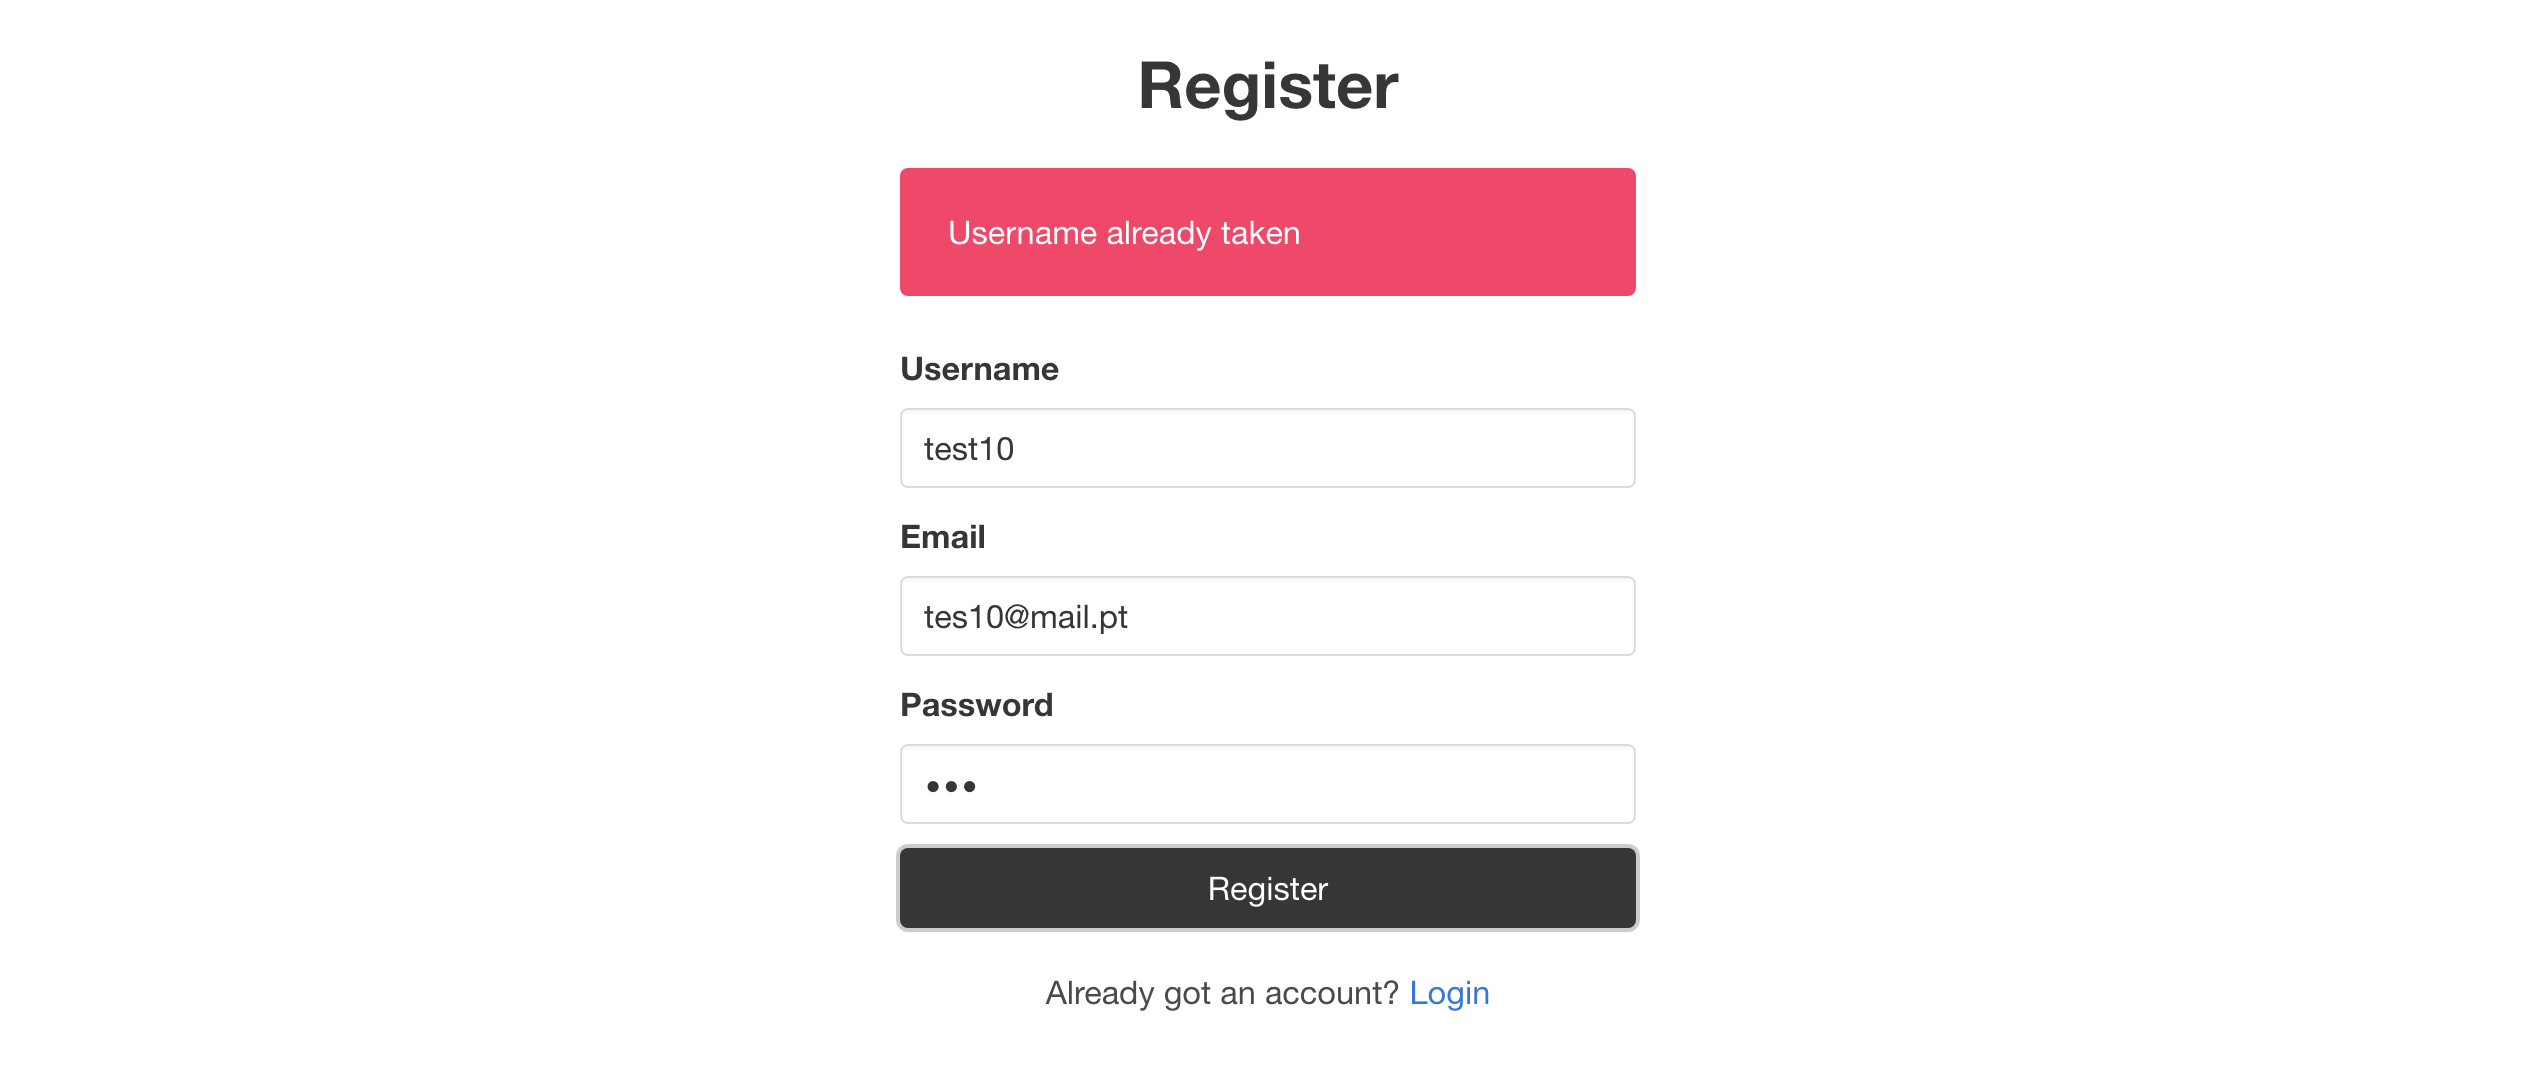
If an error occurs, the error message is displayed by the Notification component we've created previously:
Switch to the console where Strapi is running and confirm that you see the email:

Copy the confirmation link and access it in your browser. This action completes the registration but you'll see a "This page could not be found" error in your browser. That's because we haven't implemented the login page yet.
Let's fix that.
Login
Create a file ./pages/login.vue and paste into it the code below:
<template>
  <section class="section">
    <div class="container">
      <div class="columns">
        <div class="column is-4 is-offset-4">
          <h2 class="title has-text-centered">Log In</h2>

          <Notification v-if="error" type="danger" :message="error" />

          <form method="post" @submit.prevent="login">
            <div class="field">
              <label class="label">Email</label>
              <div class="control">
                <input
                  v-model="email"
                  type="email"
                  class="input"
                  name="email"
                />
              </div>
            </div>
            <div class="field">
              <label class="label">Password</label>
              <div class="control">
                <input
                  v-model="password"
                  type="password"
                  class="input"
                  name="password"
                />
              </div>
            </div>
            <div class="control">
              <button type="submit" class="button is-dark">
                Log In
              </button>
            </div>
          </form>
          <div style="margin-top: 20px">
            <p>
              Don't have an account?
              <nuxt-link to="/register">Register</nuxt-link>
            </p>
            <p>
              <nuxt-link to="/forgot-password">Forgot Password?</nuxt-link>
            </p>
          </div>
        </div>
      </div>
    </div>
  </section>
</template>

<script>
import Notification from "~/components/Notification";

export default {
  components: {
    Notification,
  },
  data() {
    return {
      email: "",
      password: "",
      error: null,
    };
  },
  methods: {
    async login() {
      this.error = null;
      try {
        await this.$auth.loginWith("local", {
          data: {
            identifier: this.email,
            password: this.password,
          },
        });
        this.$router.push("/");
      } catch (e) {
        this.error = e.response.data.message[0].messages[0].message;
      }
    },
  },
};
</script>
Testing Login
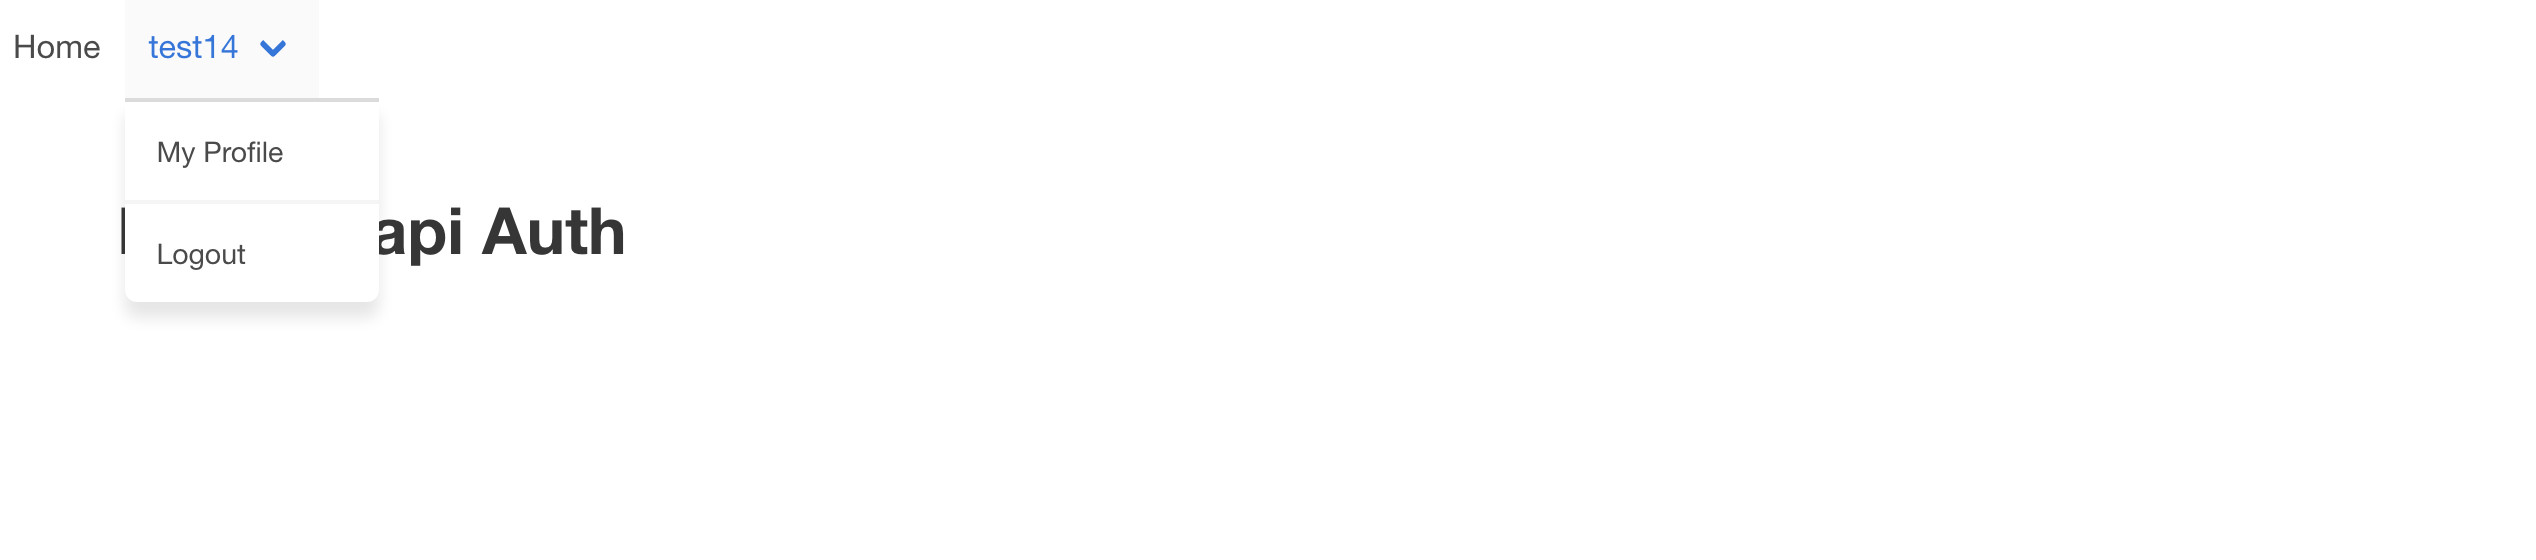
Navigate to http://localhost:3000/login and login with a previously registered user:

Notice the changes in the Navbar:
Logout
Let's now add the logout method that's triggered when the user clicks the
Logout Navbar link.
Edit ./components/Navbar.vue and add the following code under mounted():
methods: {
    async logout() {
      await this.$auth.logout()
    }
  }
User Profile
Time for the user profile page.
Create a file ./pages/profile.vue with the following code:
<template>
  <section class="section">
    <div class="container">
      <h2 class="title">My Profile</h2>
      <div class="content">
        <p>
          <strong>Username:</strong>

        </p>
        <p>
          <strong>Email:</strong>

        </p>
      </div>
    </div>
  </section>
</template>

<script>
import { mapGetters } from "vuex";

export default {
  middleware: "auth",
  computed: {
    ...mapGetters(["loggedInUser"]),
  },
};
</script>
The auth middleware guarantees that only logged in users can access this page.
Guest middleware
If the user is already logged in, it's probably a good idea to block the access to the register and login pages.
Create a file ./middleware/guest.js:
export default function ({ store, redirect }) {
  if (store.state.auth.loggedIn) {
    return redirect("/");
  }
}
Define the new middleware in ./pages/register.vue and ./pages/login.vue:
export default {
  middleware: "guest",
};
Password Reset
Let's now implement a password reset mechanism.
This will be achieved with the following workflow:
- In the Forgot Password Page, user submits email.
- If the email is in Strapi's user database, user receives email with a link to the Reset Password Page containing a reset code as a URL parameter.
- User clicks the link and specifies a new password.
- The new password is sent to Strapi, along with the reset code.
- The password is updated and the user can now use it to login.
Forgot Password Page
Create a file ./pages/forgot-password.vue:
<template>
  <section class="section">
    <div class="container">
      <div class="columns">
        <div class="column is-4 is-offset-4">
          <h2 class="title has-text-centered">Forgot Password</h2>

          <Notification v-if="success" type="success" :message="success" />
          <Notification v-if="error" type="danger" :message="error" />

          <form v-if="!success" method="post" @submit.prevent="forgotPassword">
            <div class="field">
              <label class="label">Email</label>
              <div class="control">
                <input
                  v-model="email"
                  type="email"
                  class="input"
                  name="email"
                />
              </div>
            </div>
            <div class="control">
              <button type="submit" class="button is-dark">
                Email me a reset link
              </button>
            </div>
          </form>
        </div>
      </div>
    </div>
  </section>
</template>

<script>
import Notification from "~/components/Notification";

export default {
  middleware: "guest",
  components: {
    Notification,
  },
  data() {
    return {
      email: "",
      success: null,
      error: null,
    };
  },
  methods: {
    async forgotPassword() {
      try {
        await this.$axios.post("auth/forgot-password", {
          email: this.email,
        });
        this.error = null;
        this.success = `A reset password link has been sent to your email account. \
        Please click on the link to complete the password reset.`;
      } catch (e) {
        this.error = e.response.data.message[0].messages[0].message;
      }
    },
  },
};
</script>
In our implementation we're disclosing whether the email is registered or not. The reason is to show that Strapi gives us that information. However, for applications with greater security requirements, we could also just display the success message, whether Strapi responds with an error or not - helping the prevention of phishing attacks.

The method forgotPassword sends a request to Strapi's auth/forgot-password
endpoint. If the email address exists in Strapi's user database, an email is
sent with a link to a reset password page in the frontend app.
To specify this link, from the left sidebar of the Admin dashboard, click
Roles & Permissions. Select the Advanced Settings tab, paste
http://localhost:3000/reset-password in the "Reset password page" input, and
save:

Strapi will attach to it a URL parameter with the code that's required to successfully reset the user password.
Reset Password Page
Let's now create the page that will allow the user to define a new password.
Create a file ./pages/reset-password.vue and paste the following code into it:
<template>
  <section class="section">
    <div class="container">
      <div class="columns">
        <div class="column is-4 is-offset-4">
          <h2 class="title has-text-centered">Reset Password</h2>

          <Notification v-if="success" type="success" :message="success" />
          <Notification v-if="error" type="danger" :message="error" />

          <form v-if="!success" method="post" @submit.prevent="resetPassword">
            <div class="field">
              <label class="label">New Password</label>
              <div class="control">
                <input
                  v-model="password1"
                  type="password"
                  class="input"
                  name="password"
                />
              </div>
            </div>
            <div class="field">
              <label class="label">Confirm New Password</label>
              <div class="control">
                <input
                  v-model="password2"
                  type="password"
                  class="input"
                  name="password"
                />
              </div>
            </div>
            <div class="control">
              <button type="submit" class="button is-dark">
                Reset Password
              </button>
            </div>
          </form>
        </div>
      </div>
    </div>
  </section>
</template>

<script>
import Notification from "~/components/Notification";

export default {
  middleware: "guest",
  components: {
    Notification,
  },
  asyncData(context) {
    if (!context.route.query.code) context.redirect("/forgot-password");
    else
      return {
        code: context.route.query.code,
      };
  },
  data() {
    return {
      password1: "",
      password2: "",
      success: null,
      error: null,
    };
  },
  methods: {
    async resetPassword() {
      this.error = null;
      if (this.password1 !== this.password2) {
        this.error = "Passwords do not match.";
        return;
      }
      try {
        await this.$axios.post("auth/reset-password", {
          code: this.code,
          password: this.password1,
          passwordConfirmation: this.password2,
        });
        this.success =
          "Password updated successfully. You can now use it to log in to your account.";
      } catch (e) {
        this.error = e.response.data.message[0].messages[0].message;
      }
    },
  },
};
</script>
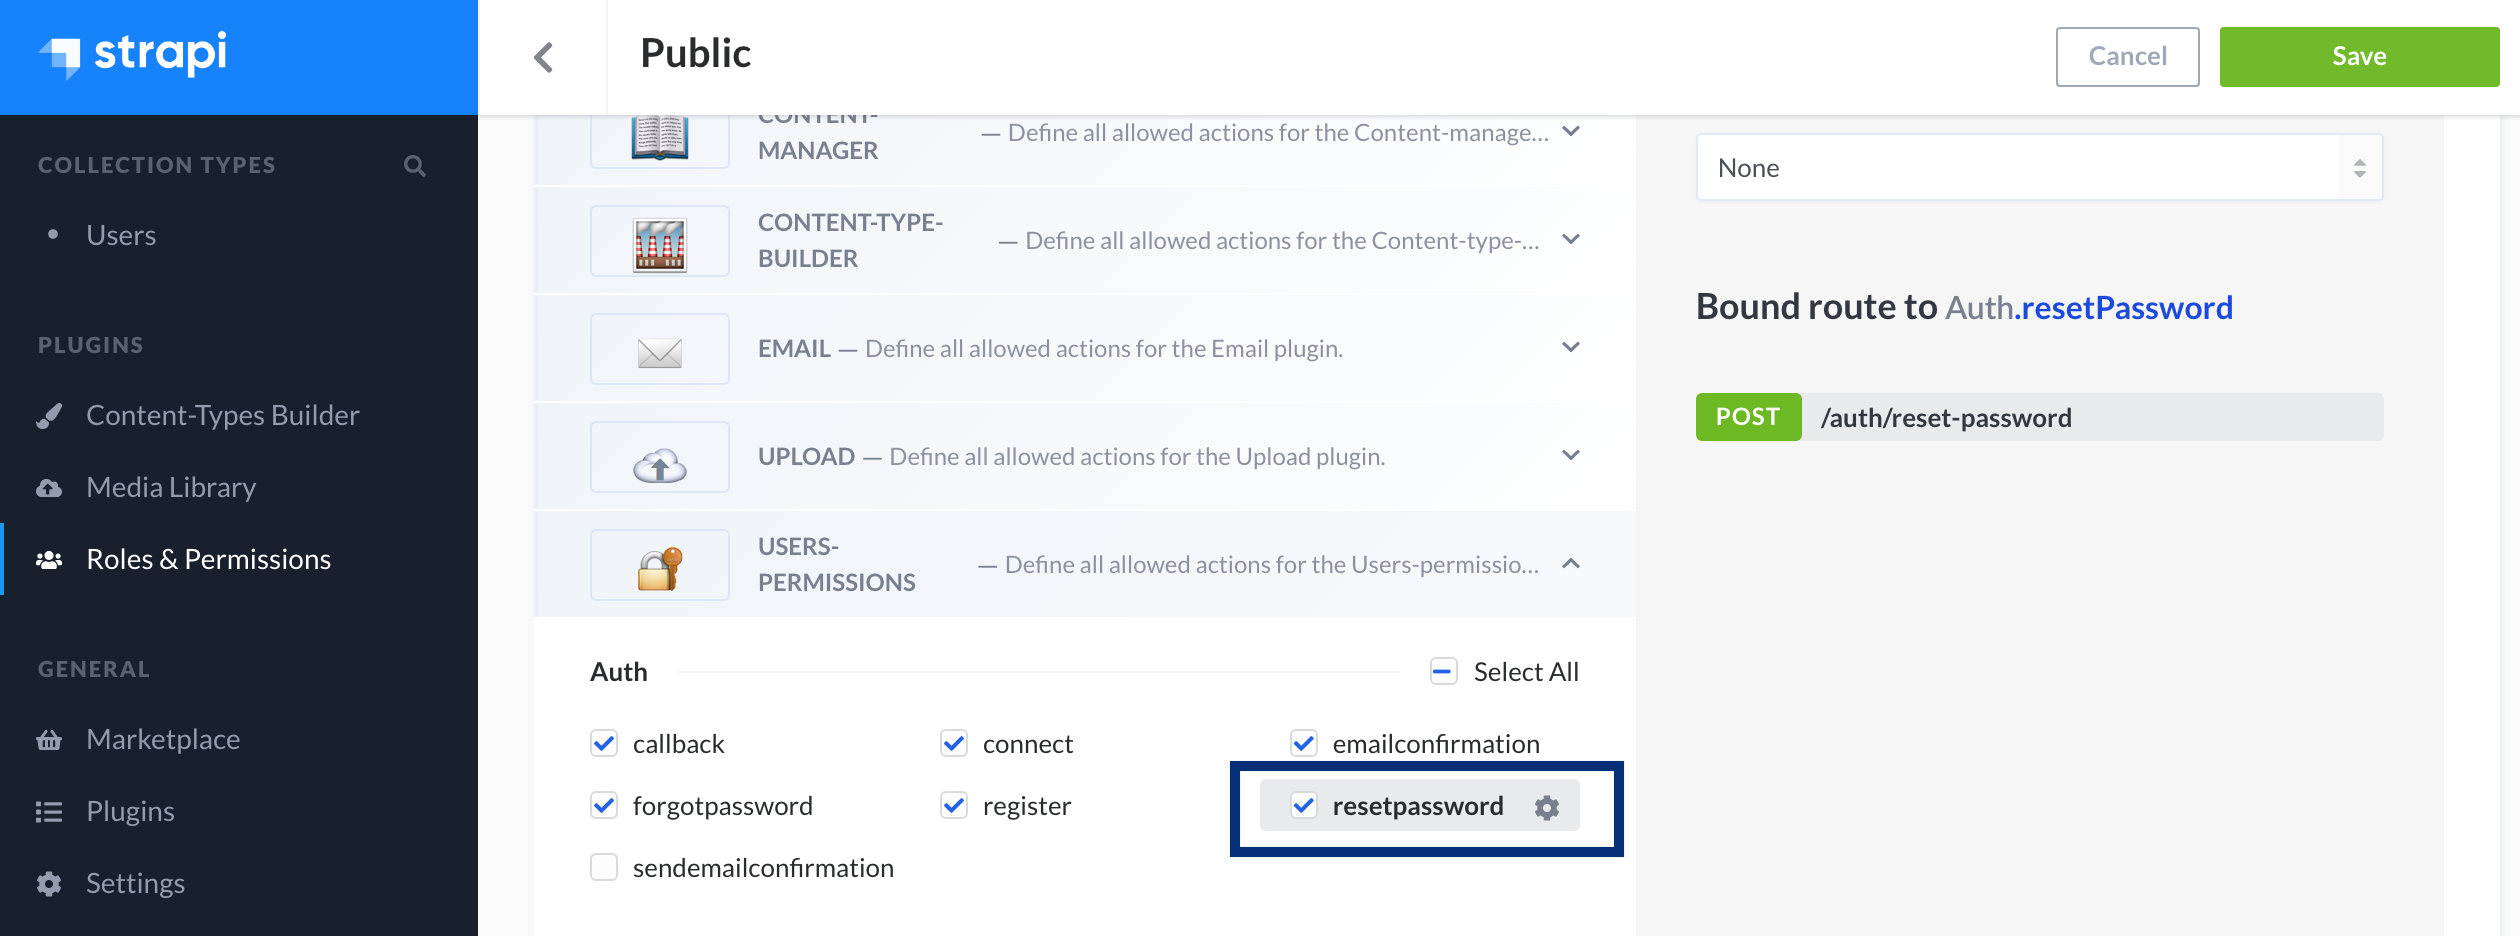
One more thing before we're able to test the password reset feature. We need to
enable the Public Role permission for the auth/reset-password endpoint.
To specify this link, from the left sidebar of the Admin dashboard, click
Roles & Permissions. Select the Advanced Settings tab, paste
http://localhost:3000/reset-password in the "Reset password page" input, and
save:
To do so, from the left sidebar of the Admin dashboard, click Roles & Permissions. Click Public and under Permissions expand the USERS-PERMISSIONS plugin. Under Auth check the option "resetpassword" and save:
Testing Password Reset
Visit http://localhost:3000/forgot-password in your browser, fill-in the
"Email" input with an email that has been registered before and click Email me
a reset link.

Switch to the terminal where Strapi is running and confirm that the mock email is there:

Copy the entire link and access it in your browser:

Fill-in the form and click "Reset Password". This action will reset the user password:

Token Expiration
Awesome! We've done a lot, but there's still something missing before we wrap up.
If the JWT token expires, subsequent requests to Strapi will return a 401 Unauthorized error.
To deal with this, we'll intercept error responses in axios and check if the
status code is 401. If it is, we redirect the user to the login page.
Create a file ./plugins/axios.js:
export default function ({ $axios, redirect }) {
  $axios.onError((error) => {
    const code = parseInt(error.response && error.response.status);
    if (code === 401) redirect("/login");
  });
}
In nuxt.config.js import the plugin we've just created:
plugins: ['~plugins/axios'],
Now, when the JWT expires the user will be gracefully redirected to the login page.
Conclusion
Hopefully you've found this tutorial helpful for implementing Strapi authentication in your Nuxt app!
You should now have a fully built, ready to be deployed in production authentication flow, through which users can register, login, and reset their password.
The source code for both projects can be found on GitHub: